Showing posts with label Craftiness. Show all posts

Wednesday, June 8, 2011

Playing with paper

I had a bit of a rough morning.  A battle of the wills over chores, some serious talk about a school issue and the messiness that always accompanies vacation had me feeling a little cantankerous.  But as I looked out at the branches of the walnut tree whipping in the wind against a dark grey, cloudy backdrop, I felt the calmness settle into my heart.  I let the peace soak into me and then I felt it; the tiny stirring of creative inspiration. 

Trees often have that effect on me, especially when the wind tickles their leaves.

I had bagels to make this morning, but they're the kind of bread that only takes a moment here and there.  So while they rose the first time, I contemplated the crafty possibilities.  Moments later, I saw in my head exactly what I wanted to try.  After I rolled the bagels in to pretty little circles and set them out to rise again, I gathered my supplies. 

I boiled the bagels, got them baking and then got started.  After a bit of measuring, cutting and gluing, this is what I made...


I know, nothing special, right?  It's just a plain old envelope with a colored band... But wait, there's more!!


The envelope is actually a little package!  It's perfect for gifting cash or a gift card, even a few little chocolates, if you made the band a bit bigger. 

Obviously this one is pretty plain - I didn't take the time to doll it up too much because the kids were coming in from playing outside and the bagels finished baking.  But I can see lots of possibilities here!

Tuesday, June 7, 2011

Strap on your art smock, it's gonna get messy!

My kids love sidewalk chalk.

I mean they LOVE sidewalk chalk.

But some days, they don't want to draw, they want to paint.  What's a frugal Mom to do?  Mix up a few cups of sidewalk paint and let them have at it!


I put two heaping spoonfuls of corn starch in each cup of  a muffin tin; one cup for each color paint you want to make.  Next, add in a squeeze of gel food coloring or a dozen or so drops of liquid.  You can always add more later, so don't worry about being exact.  Now it gets messy, so you may want to do this next step outside, especially if you've got little helpers.


I used a pop bottle, rinsed and filled with cool water, to add a bit of liquid to each cup.  Stir the mix around and add more water, if necessary.  You'll know you've got it right when the cornstarch isn't clumpy anymore, but you do want it to be a little thick, so add the water in small amounts.  Do this step one cup at a time, otherwise the other cups will be solid bricks by the time you're finished mixing the first.


A few things to note:

*This paint dries very quickly and becomes slightly paler as it dries.
*As you can see in the pictures, we used several different kinds of brushes.  The bristled brushes, natural and synthetic, were harder to use.  They pick up more of the cornstarch and don't spread the colors as nicely as the foam brushes.  However, all the brushes we used were super easy to clean by running them under cold water until the water ran clear, then switching to hot to make sure they were good and clean. 
*Because you're using food coloring, you don't want to get this all over the house or your clothes - that's what art smocks or old, holey t-shirts are for.
*If you're like me and inadvertently set a spoon covered with hot pink paint on your kitchen counter, you will have a pink stain to bleach off later.  Don't be like me - set the spoons on a plate or paper towel.
*I've read that you can use Kool-aid to color and scent the paint, but I haven't tried it yet.  It seems like the colors would be a bit more vibrant but equally,  if not more, staining.


Friday, June 3, 2011

And the winner is....

Cynical Realist!


Thank you all for your lovely comments (and to those of you who read, but don't comment, feel free to give me a shout out - I'd love to know who you are)!

I'll contact the winner shortly, but please don't forget that those who didn't win can make your own dahlias by following the link here.  

Thursday, June 2, 2011

Herbaceous


I saw a tutorial for these gorgeous felt dahlias a few weeks ago and immediately set to work making my own. I put off posting as long as I did because the red one was a gift for my Gram and I didn't want to post it here before I had a chance to deliver it to her. As luck would have it, her computer needs a tune-up, so I had a perfect excuse to drive out to her house!


I made the red one first, but just couldn't stop! Cutting all those petals does take a bit of time, but it's pretty mindless once you get into the groove, making this a perfect movie watching project.


Each dahlia took me about an hour and a half, including time for the glue to dry. Speaking of glue, I had an opportunity to try a glue I'd never used before - Beacon Adhesives Fabri-Tac. This is some pretty cool stuff! It only sticks to fabrics, so if I got it on my fingers, I simply rubbed them together and it wiped right off! It also didn't stick to my plastic tablecloth or the bottom of the pan I used to hold the petals as they dried. But on the fabric, it has serious holding power! It's a little pricey at about $6 for a 4 oz bottle, but I barely used any for this project, so it'll last a good long while.


Each flower has a secret compartment on the back, just the right size for adding a small picture or a note! This one wasn't finished when the picture was taken, but a pin back or magnet could easily be added. To give you a better idea of size, the red square on the back is just about the size of a postage stamp.

And, because I think you guys are pretty awesome, I'm giving away one of these dahlias!  To enter for a chance to win, simply leave a comment here (not on the Facebook link), any comment will do.  The winner gets one dahlia, with either a magnet or pin back added, your choice of colors from my available stash.

The winner will be announced tomorrow, June 3 and I'll get started on the dahlia as soon as the winner lets me know what color he/she wants.


EDIT: Due to some people having a hard time commenting here, I'll accept comments on Facebook as entries into the contest, too. 

Wednesday, May 4, 2011

Soaping Up

Holey moley - it's been a long time since I wrote anything here!  I didn't realize just how long until I happened to see that I haven't posted since mid-April.  Yikes.  : )

Quite a few years ago (like 8-10) I learned how to make cold-process soap.   That's soap from scratch using fats and lye, it has to cure for no less than 2 weeks and up to 8 so that the lye doesn't chemically burn your skin when you use it.  It's been a long time since I made any, but it's something I've been thinking about a lot lately. 

I really enjoyed trying out new fragrances and different ingredients to make unique finished products. 

So here's my question to you, lovely readers:  If you could have any kind of custom scented soap, what would you go for?

Wednesday, April 6, 2011

Scratch-off Tickets

You know those lottery tickets that you scratch off to see how much you win?  I made some!  I saw a tutorial online, I forget where, but the instructions seemed really complicated and involved supplies I don't keep on hand.  But the concept was so simple!


Here's what I did - I used Word to design the tickets.  I wanted to make six tickets, so I made a table with six cells, dragged the bottom of the table to the bottom of the page and used the row distribution tool to make the cells all the same size.  I added text and a heart, then put a small box inside the heart.  The small box contains the text for the prize and is the part I wanted to cover with the scratch off goop. 

Yes, that's the technical term.

I printed the page and cut the cells apart.  To give them some rigidity and color, I cut a sheet of red cardstock and used a glue stick to mount the paper to the cardstock. 

I needed a way to keep the silver goop from sticking to the paper, so I cut a small square (about an inch and a half square) of packing tape and centered it over my design.

The silver goop?  Acrylic paint mixed with dishsoap!  Brilliant!  On a small plate I mixed two parts metallic silver paint with one part Dawn original (what I happened to have on hand - I would think that any dishsoap would work).  Mix gently, you don't want bubbles. 

Then I simply painted that mix onto my cards.  I tried painting it on really smooth and nice, but it's so thin that I'd have needed way more coats than I have patience for, so I kinda glopped it on and smeared it around with the tip of the paintbrush.  After it dried for about 20 minutes I gave the paint a touch up wherever I could see the text, then I let them dry completely. 


I used silver to give them a traditional look, but I could see these in all kinds of color combos - Red and green, silver and blue, orange and black, party colors, etc...  The possibilities are limitless!

Tuesday, March 8, 2011

Invitational

I had occasion recently to make some party invitations.  Now, if I'm making 100 invitations, obviously they need to be simple, streamlined and inexpensive.  But, if I need less than a dozen, I have no qualms about getting a little more involved and crafty with it.

So here's what I came up with....

(drumroll please)


An overview

Each invitation is a giant size Almond and Toffee Symphony bar! 

To make them, I carefully cut the paper label off of one and measured it, then opened a word document and created a cell the size of the label.  After I typed in all the party information, I simply printed my text onto the back of 7 sheets of coordinating scrapbook paper (not cardstock). 

Pretty papers!
On my sample invitation I played with different tag options until I finally settled on this one.  I think it turned out pretty cute.  For the white circle I traced a baby food jar lid and for the brown, the base of an ice cream dish from my Mom.


Depending on the colors of the paper, some invitations got a brown backed tag, like this one and some got a peach backed tag.  Scooter helped me decide what colors to use and she picked the brown ribbon.  We also bought some cream colored ribbon, but we decided to save that for the party favors!

And, just so you know, I am aware that several of you didn't get these invitations and here's why - this party is for my sisters and Moms only (and even of those it's only for the ones that live near here).  So please don't feel bad, you're still some of my favorite people! 

Here are a few more pictures, just because I like them...


That top paper is my favorite!

Friday, February 18, 2011

Current Events

There's nothing really special going on here today and I thought it was time for another update, so here you go...

Knitting:  Mandie and Caleb's afghan is moving along, although slower than I'd like.  As of last night, it was 14 inches long and is starting to feel like I might actually finish it someday.  It makes my hands hurt to knit for too long, so I've been breaking it up into several small knitting sessions instead of one long one each day.  Seems to be working so far!
I've pretty much put my sock knitting on hold, so no update on the Mockery socks.  Sock #1 is still at the heel turning.

Pookie asked me this morning to knit him some fingerless mitts like the ones I made for Midge last year.  He knew exactly what he wanted - black with rainbow stripes, a little tighter than Midge's, but just as long.  He was so disappointed when I told him they'd have to wait! 

School:  The Boy is doing very well with American School (correspondence high school) and has an average grade of about 95%.  He's completed a couple of courses, including Essential Math.  He just sent in his final for that class and he was at 99% before, so I expect he'll finish the class in the high 90s.

*proud Mom face*

The other kids are doing very well, too.  Scooter is nearly ready to start high school and we'll very likely enroll her at American School, too.  I thought about reusing The Boy's books and just designing my own exams, but one of the big benefits of American School is the diploma.  If we reuse the books, she'll get a good education, but not a diploma.  She can still take the GED, but it's not quite the same thing, you know?

Pibb will be starting fifth grade very soon - probably in the next six weeks.  We're just slogging through the last of the 4th grade book and making sure he understands some of the math concepts before we push on to the next level. 

A project I'm really excited about is history timeline binders.  Each kid gets a three ring binder, with divider tabs for different time periods.  Inside each divider we'll make a timeline and then do pages with more information about the individual entries.  We're going to start them this coming week, so look for more details in a future post.

Midge is still struggling with reading, but I took him in yesterday for an eye exam and now I think I know why it's been so hard for him.  The doctor said that he can see clearly, but its hard for him, so he's putting so much effort into just seeing the letters that he doesn't have enough focus left to really be learning the sounds.  I ordered him some reading glasses and I'm looking forward to seeing just how much better he does with them.  

Bryant's job:  He's been at his current job for about six months and it's going really well.  He's traveling a lot, taking classes and teaching classes.  In fact, I suspect he's working on the slides for his class this afternoon right now!

*proud wife face*

Household:  Have you seen the movie The Money Pit with Tom Hanks and Shelley Long?  Yeah, that's kinda how it feels lately...

A few weeks ago, our heater died.  The estimate to replace it was far more than we could afford at the time, but between scrimping together what we could and a personal loan from a great couple, we were able to order a replacement last week.  It was installed a few days ago and while the new system is significantly smaller than the old one, it is far more efficient and should do a much better job.

Almost immediately after the heater crapped out the kitchen ceiling started to leak like crazy.  The roof over the kitchen/garage join has been problematic pretty much from the beginning of time and it's really just given up the ghost now.  So we're going to rebuild the roof in that spot, then put in some flashing and new shingles.  Plus, we'll insulate the atticway to help avoid the ice dam problem. 

However, the roof leaking has damaged the kitchen ceiling enough that it needs to be replaced.  But, the people who installed the ceiling didn't seem to know what they were doing, so replacing the ceiling means replacing the walls, which means replacing the kitchen cabinets, countertop, etc... 

Late in the summer we'll be gutting the kitchen and replacing pretty much everything but the floor.  Oh, and we're keeping out fridge and stove as they are both pretty new. 

As much as I hate having to spend so much money, I'll be happy to have a kitchen that is a little more up to date and that I can choose colors, materials, etc... 

Oh, and our current kitchen has almost no electrical outlets, so we'll remedy that, too!

Craftiness:  I'm currently planning three parties (one in April, one in May, one in September) and I'm loving it!  I've been whipping up sample invitations, party favors and decorations like crazy.  I'm tempted to post all my projects here, but then when it's time for the parties, there won't be any surprise left!  So I think I'll hold off on posting too many projects, at least for right now. 

I will say this, though - I went to Michael's yesterday and bought a pad of 180 sheets of scrapbook paper and I had to force myself to sit down and work on school stuff instead of just playing with it all morning!

What have you been up to lately?

Wednesday, February 16, 2011

Magic Box

I love scrapbook paper, but I don't scrapbook.  I have done it and I have some supplies, but I never really got into it.  But, oh, the papers!  There is such a variety of colors, textures and sizes available that I could be entertained for days with nothing more than stacks of paper, a pair of sharp scissors and a pencil.


Fancy box - Not so fancy from this view...

This is what I made last night.  Yeah, I know it doesn't look like much right now, but I am super proud of it for two reasons.  1)  I've never made a paper box before.  2)  Looks can be deceiving.  This isn't just a plain old box...


When you take the lid off, this is what you'd see.
The coolness factor increases a little here.  It's becoming clear that it's not really just a plain boring box...  And then it opens up!


Fancy box!!
 Each of those boxes is attached to the outside of the box, but not attached to any other box.  Seriously simple for such a great presentation!  I could easily see these boxes filled with candies, jewelry (like a necklace, bracelet, earrings set - fourth box filled with chocolates, because really, what goes better with jewelry than chocolate?), cookies, even Matchbox cars. 

I opted for a Valentine's color scheme, but in my head I've already put together about a hundred different color options.  Plus, each box can be decorated with stickers, stamps, bits of lace, ribbon or whatever suits your theme.

If you want to make your own, here is the tutorial I used.  If you follow the link, you'll see several other color/decorating ideas.  She also uses different papers to achieve different looks.  I used heavy scrapbook paper (not cardstock) and it worked beautifully. 

When I showed this to Bryant, he asked me what I planned to do with them.  And you know, I have no idea.  They feel too special to give to just anybody - like they should only go to people to appreciate handmade items and the time and effort involved in making something like this. 

My Internet connection keeps dropping out, so I'm going to post this now, while I still can.  : )

Friday, February 11, 2011

Dressed Up Cupcakes

If you've been reading this blog for any length of time, you probably know that two things I love to do are bake and craft.  Today, I combined them. 

Perhaps you've seen the ridiculously expensive cupcake wrappers for sale all over the Internet or in a specialty store.  If you're not sure what I'm talking about, click here to see some examples. 

Now, some of those are laser cut and might be a bit fancier than mine, but at $13 for a dozen, I need them to be more than just pretty - they need to be able to get up and make the cupcakes themselves!

On the other hand, from a 12 X 12 sheet of scrapbook paper that cost me $ .59, I was able to get six of these pretty little wrappers...


Obviously I used several different sheets of paper for these.


For this one, I even went a little crazy and used some fancy blade scissors!


And, because Bryant loves graph paper...


I used the template here, but found it was a bit too tall for my cupcakes (you might notice that some of them look like they're sinking down into the wrapper).  After I made a few of them, I trimmed the template down by about 1/4 inch and they fit much more nicely.  However, I think that's very much a matter of personal taste and may need to be adjusted if the cupcakes are particularly tall. 

I think some cute shaped punches would add a nice touch, particularly if they were for a special occasion.  For a lazy Friday though, all the fancy we needed was sprinkles, artfully applied by my decorating crew - Pookie, Midge and Scooter!

Saturday, February 5, 2011

Cupcakes don't hang!

Sorry for the bloggy silence lately - I've been in a bit of a funk.  Between the heater going out and a few minor issues, I just haven't had much creative voice or desire to do anything beyond the daily necessities. 

However, yesterday I was kicking around online, looking for a particular tutorial I saw eons ago, when I saw this...

I can't imagine seeing this and not getting excited!

Cupcakes hanging from the ceiling?  Oh, the genius!  Here is a link to the whole post and more images.  

I haven't quite convinced Bryant of my need to build this yet, but I'm working on it, so stay tuned...

Wednesday, January 12, 2011

Weapons of Mass Distraction

Warning:  The following links may take up an outrageous amount of your time... So grab a drink and some snacks before you start clicking.

http://www.qwantz.com/index.php?comic=1872  This one is called Dinosaur Comics - and it's exactly what it says it is.  But hilarious.

http://www.soulemama.com/soulemama/  If you have small children, if you live just off the beaten path or if you just enjoy gorgeous photography, give this blog a shot.  It makes my heart happy each and every time I read it.

http://www.spritestitch.com/  Geeky crafty fun - what more could you want?

http://www.re-nest.com/re-nest/creative-reuse/50-creative-reuse-ideas-to-keep-you-busy-this-weekend-122566  There isn't much that can't be upcycled and this link will give you lots of great ideas!

http://www.foxyblunt.com/Default.aspx  Foxy.  Blunt.  Perfect.

http://www.weebls-stuff.com/wab/Christmas+4/  Hands down, the best Christmas video ever (and the inspiration for next year's Christmas cards)!

http://smallnotebook.org/  Organize, declutter and minimize the "stuff stress" with this site.  While I don't think everything here applies to most people, there are tons of helpful tips and ideas.

http://www.graceisoverrated.com/  I adore the printable journal pages offered here (and the funny stories that often accompany them) - I've printed and colored and journaled in quite a few of them.

http://freepatterns.k1p1keepingyouinstitchesstudio.com/  It's a little bit of a pain to navigate, but this site is a treasure trove of knitting patterns.

http://thepioneerwoman.com/tasty-kitchen/  One of my very favorite recipe sites - do not read this if you're hungry or dieting...

http://www.oneprettything.com/  More crafts than you can shake a stick at.

http://www.danoah.com/  Single Dad Laughing - often hilarious, always thought provoking.

So, did you click any of those?  Or were you so bored you're ready to go scrub the toilets just for something to do?

Thursday, December 16, 2010

In which we discuss knitting...

As I sat down with my computer this morning I thought to myself, "I know I should blog, but there's just nothing going on."  And then I thought of Simon Pegg's character in Hot Fuzz - "There is always something going on!"  So...

Gift knitting is going fairly well.  I'm cutting it down to the wire, as usual.  My last two projects are in the works, one is just over half done, the other is just shy of it.  Both are simple enough that I can pick them up and put them down as I want to, which might be part of my problem.  It's easy to put them down whenever I feel like it because I know I can just pick them back up when I have a moment.  So I put them down far too often...  I'll do a post about the individual projects after they've reached their intended owners.

I'm already itching to start my post-Christmas sock knitting!  My sister-in-law gave me some gorgeous sock yarn this summer and I can't wait to start turning it into socks for myself.  The pattern I chose is called Mockery (which I thought was pretty fitting for me) and should show off the yarn nicely.  The yarn is here and is actually the colorway pictured at the top - Invercargill #1810.  Gorgeous!  And it's super soft and delicious!

When those are done I'll be working on Mandie and Caleb's wedding afghan.  She chose the pattern and yarn (a complete departure from Reva and Michael's afghan - I chose the pattern and yarn and they had no idea I was making it).  The yarn is white with green, blue and copper flecks - very pretty!  When I knit Reva and Michael's afghan, the focus was on the twists and curves of the cables; the yarn was really just a vehicle for displaying the stitches.  Mandie and Caleb's afghan has a very simple stitch pattern, so the focus is on the yarn instead.  I'm excited to see how it looks all knit up!

Huh.  Apparently I had something to say after all...


Tuesday, December 14, 2010

Snowy Day

View from the living room window.


The bird feeder Bryant and I made this summer is covered in snow!
 While it's snowing like crazy outside, I wanted to try my hand at making 3D paper snowflakes.  I've seen them made of paper and felt.  The felt ones looked a little too sturdy for my taste, but the paper ones are light and fluffy and perfect.  I am still working my way through the Simplicity catalog, so I grabbed six more pages, cut them down into six inch squares and after a bit of folding, cutting, taping and stapling....


Paper snowflake

I know it looks a little complicated, but these are seriously simple to make.  And mine is huge - I used six inch squares, so my total width is about 12 inches.  Next time I'm going to try using three inch squares of paper.

Backlit

There's a back lit view, just because I liked it.  : )   I think the silhouette gives you a little better sense of the folds, too.

If you're interested in making your own, here is a link to the tutorial I used.  I'd love to see pictures if you do make some!

Completely unrelated, while I was taking the pictures of the snow, this guy showed up and let me snap a few photos. 


Thursday, December 9, 2010

Christmas Village

I have a fairly extensive Halloween village complete with quite a few buildings, stand alone figurines, trees and a custom built base.  What I don't have is any desire for a Christmas village.

Until I saw this.  


My house
 These are printed on regular printer paper, but I imagine that on card stock they'd be a little more sturdy and the folds would be neater.  If you follow that link above, you'll see that this house is free and the artist also offers a pack for purchase.  The purchasable pack includes three more buildings and several free-standing trees.  I'm seriously considering buying them.

Scooter's house - I love the blue on the icicles!


She used three shades of red to achieve a realistic brick effect!

Pibb's house - "under construction"
Pookie's house
The Boy opted not to participate in this activity and Midge has already colored three houses, but he's not happy with any of them, so he's asked me not to post photos.  These pretty little houses are currently decorating the television stand next to my Matryoshka dolls (Bryant bought them for me).


I know that picture is kind of random, I just wanted to show them off...   : )

Friday, December 3, 2010

Kusudama


These are the kusudama flowers I've made in the last two days - aren't they gorgeous?  I love them! 


I've been using pages from old sewing pattern catalogs, so my flowers have an almost fabric-like look. 
If I'm making a small flower, I can get all the petals from one page, so the color schemes
often compliment each other.


Tragedy!

Cardstock was a bit too heavy.  The paper cut and folded nicely, but my double sided
photo squares weren't strong enough to hold it together. 


I hate photos that don't give you any scale, so I'm including this one of my camera lens cover.  The small flowers were made with 3 inch squares of paper, the large ones were 6 inch squares.  Each flower has six petals - but the large flowers are slightly different.  On the left one I used the standard directions. 
 The one on the right, I tried the alternate directions - the result was a flower with only a single 'point'
in the center of each petal.

If you've got a few minutes and you're feeling crafty, I highly recommend this tutorial. 

 Be forewarned, though; these are addictive.  I've had an old Simplicity pattern book on my dining room table for a couple of days and each time I walk past, I feel compelled to rip out a page
and fold a petal or two. 

Last night Bryant and I were at a fast food place and I tried to fold my napkin into a flower
 (flimsy paper and a not quite real square made it virtually impossible)!

If you do make some, I'd love to see them, so snap a picture for me, okay?

Monday, November 22, 2010

In my field of paper flowers...

Oh, delight!  I just made a paper lily!  I know it's silly - it's just a bit of folded paper, but I'm super excited and pleased with how this turned out. 


If I were making these for a project I would use a different paper - I just grabbed a sheet from my stash of 12 X 12 scrapbook paper.  I would probably use a solid or semi-solid color and perhaps I'd use a slightly thinner paper.  This turned out really well, though and the size is exactly what I was looking for.

If you're interested in making your own, here is a link to the tutorial I used.

Tuesday, October 19, 2010

Knitting and Kidlets

I asked for blog suggestions on Facebook this morning and thus far, I've gotten only one response.  "Knitting??? What's going on the with the kiddos?"  So here you go, Kelly...

Knitting:
The vast majority of my knitting in recent days has been gift knitting.  That's why there's no real update or information about it.  I will say this - the project I'm putting most of my effort into is made with yarn from recycled pop bottles and is crazy soft.  It's also deep charcoal grey, which I'm absolutely loving!  The pattern is simple enough that I can knit it without looking at my needles, but interesting enough to make a pretty finished fabric.  That's really all I can say - I'm not sure if the intended recipient is a reader or not.

I have one other gift knit in progress - it's green, a wool blend and has cables.  The recipient of that one is a reader, so that's all you're getting there, too. 

I did spend a few minutes last week learning how to make a ballband dishcloth.  For those of you who don't know what that is, here's a link to a photo.  I've always been afraid of working with two colors at once and have only done it in one project (but in that project I was making stripes, so I just carried the unused yarn up the side), this is different.  I've spend a lot of time on Ravelry and other sites looking at these cloths and waiting until I felt ready to try them.  But then I realized what I was doing - I have a tendency to put off anything I'm unsure of and I know myself well enough to know that if I didn't just jump it, it was never going to happen.  So I grabbed two contrasting yarns from my stash and set to work.  Remember a few sentences ago when I said I spent "a few minutes?"  Yeah, that's not an exaggeration.  It was super easy and I felt like a colossal fool for being so nervous about it. 

I did rip out the one I started, but not because it wasn't going well.  I ripped it because I'd just grabbed two yarns from my stash and they didn't work well together.  But I bought orange and black yarn this past weekend, so I'm hoping there's a Halloween colored ballband cloth in my near future. 

As far as the kidlets, there's not a lot of change going on.  The Boy has been itching to find someone to play D & D with, so we're looking into a game store nearby that hosts lots of groups for everything from Magic games to D & D and everything in between.  I'm hoping to get him involved either there or a youth center around the corner.  He has a hard time meeting people and socializing is not his forte, so I have been pushing him to pick something to get involved with.

Scooter has decided to learn Draconic (the language of the dragons) and has been studying a lot.  We found and printed a Draconic alphabet, as well as a list of over 100 common words for her to work with.  I'm sure that'll be a great asset to her when she's applying to colleges...

Pibb has been reading a series called, "The Last Apprentice" by Joseph Delaney.  The books are between 200 and 400 pages each and there are seven or eight, although he's not finished with the series, so I imagine there will be more.  He spends most of his time either playing with Legos and Bionicles or reading.  It's very gratifying to see him enjoy reading - it was extremely difficult to teach him to read.  He was convince he couldn't do it for a really long time. 

Midge is struggling with the same thing.  He knows the letters and he knows some words, but he's sure he isn't able to do it, so he barely tries.  We've just started a program of learning 10 new Dolch sight words each week.  Every day he has activities with the words (one day he gets to play with my alphabet stamps and "write" each word in his word journal, one day he gets to write the words with colored pasta, etc...)  The idea is that by the end of each week, he'll have learned 10 new words, learning all 220 Dolch words and 95 commonly used nouns by the end of the school year.  He's also had more interest in reading lately, asking for two or three chapter books each day and I think that's a good motivator for him.  He wants to know the stories, but I don't have time to spend 5 hours a day just reading to him, so he's having to try to read them on his own. 

Pookie is sweet, as always.  His main focus lately seems to be Legos and following his brothers around.  He's been paying attention when the bigger kids do school and has started recognizing letters and sounds without my formally teaching them to him.  He also knows all the numbers 0-9 and can write them on his own.  He loves to pretend to visit the ice cream store and is constantly bringing us pretend ice cream to eat.  Maybe I should take him to Cold Stone again....

And now I need to go make breakfast burritos (for lunch), but I'll be back tomorrow with a recipe!

Tuesday, October 12, 2010

Paper Flowers

I love the idea of recycling.  Not just because it's good for the Earth, but because I love the idea that you can take something out of it's intended purpose and turn it into something completely different.  It reaffirms for me that change isn't always a bad thing and helps me remember that anything can be beautiful, even if it didn't start out that way.

A treasure trove of recycled paper tutorials is the website How About Orange.  Seriously, if you've got a few minutes, pop on over to her site and click the "DIY Tutorials" button on the top.  I'll wait...


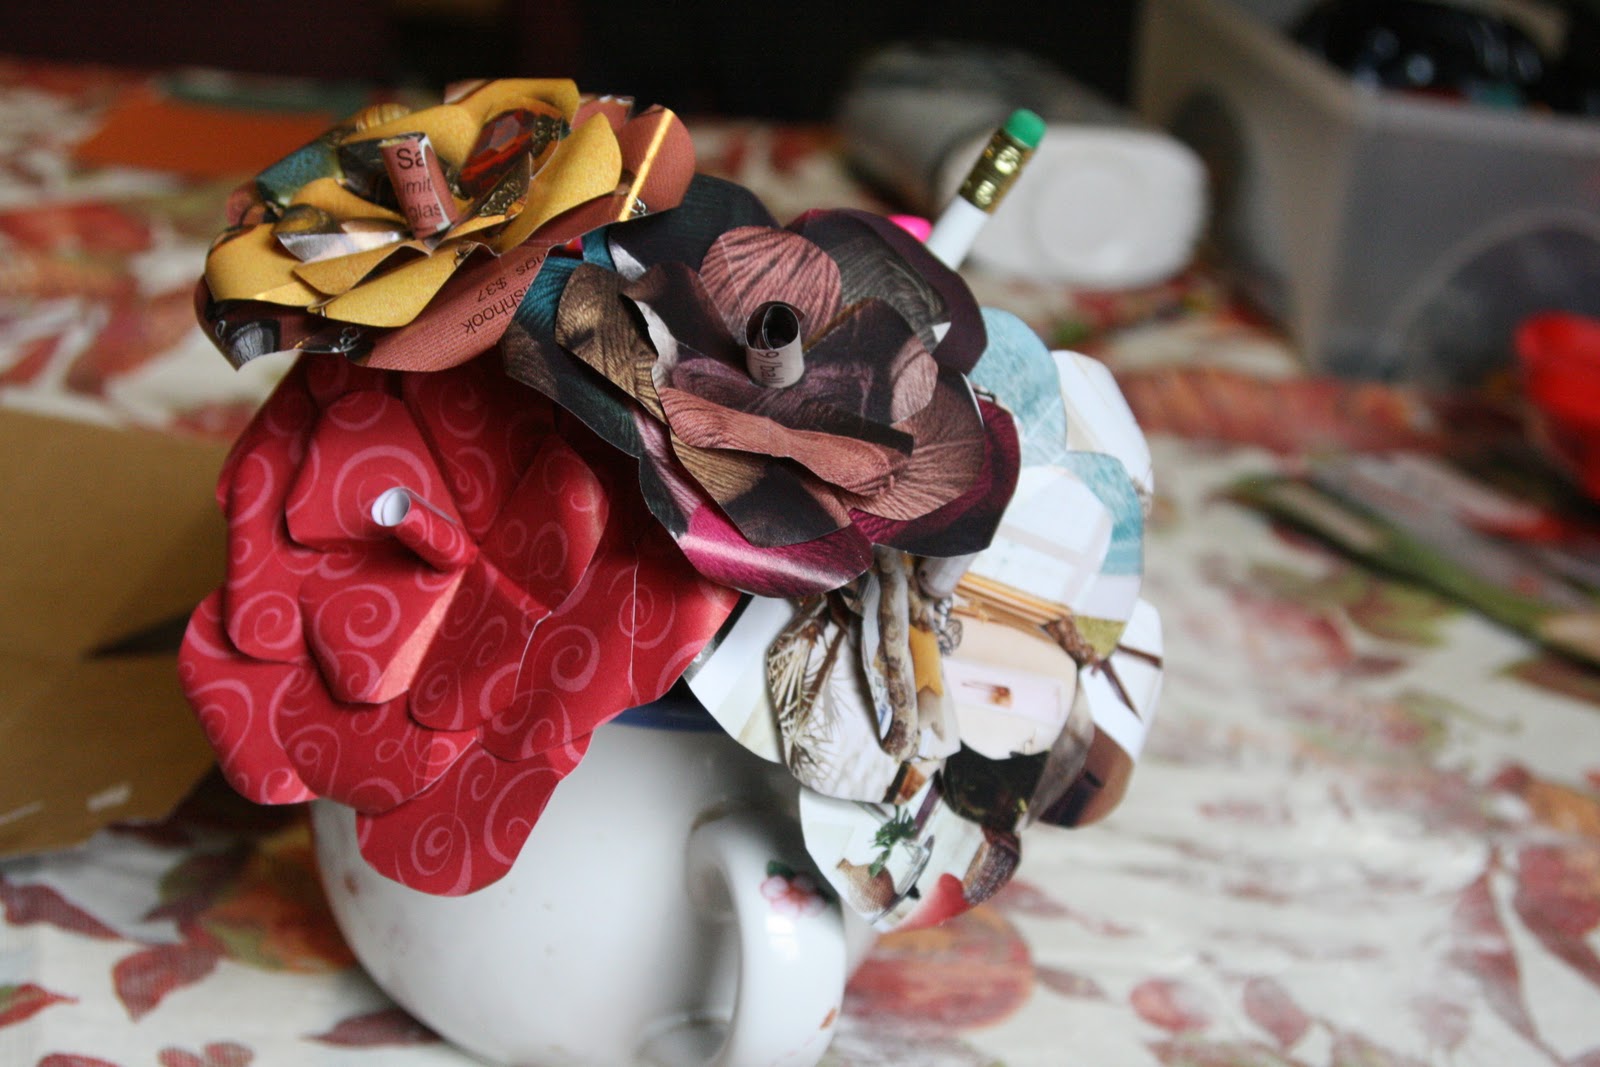
I came across this tutorial a few days ago and have been making paper flowers ever since! These are fabulous because they require no special tools or techniques.  I used paper, scissors, a pencil and a thin knitting needle (although you could easily use a skewer or other thin stick).  I did also make a template for myself out of some old cracker boxes I'd been holding onto.  For the large flower I used a Cheez-It box and for the smaller one, a whole wheat saltines box was the perfect size.  Making the template was by far the most time consuming part of this project, but I knew I'd want to make several so it made sense for me.  If you just want to try one or two, use the printed pattern as your template and skip that step entirely.

For the first flower, I pulled out my trusty old issue of House Beautiful (Dec/Jan 2010).  It was love at first fold...


But then I wanted to try one with scrapbooking paper, too...  This paper is a little heavier than catalog or magazine pages, so it was a little easier to keep the edges curled, but not so heavy that it was hard to work with. 

Those are both the large size, so for the smaller ones I opted for catalog pages.  The first one was from the cover of Knit Pick's autumn yarns catalog (BTW, I highly recommend Knit Picks to anyone with any interest in knitting or crochet - they have amazing yarns at really affordable prices, plus tons of free or very inexpensive patterns).  This paper is very thin, so it was a little harder to score it without ripping through and you can see in the picture that the lines are very obvious, especially on the smallest set of petals.

And lastly, one from a Premier Jewelry catalog (my sister is a salesperson for them and I happened to have an older catalog kicking around - fashionable and affordable!).  I have to say that this paper is about the perfect weight for this project.  It's not quite as heavy as scrapbook paper, but thicker than catalog or magazine  pages typically are.  It was easy to cut, easy to fold and held the curls really well. 

  These flowers are currently decorating my Sharpie dish, you can see them in a few of the pictures, but I can imagine all kinds of lovely uses for them - wreaths, on gifts, strung together as a garland, even boutonnieres! 

Tuesday, September 28, 2010

House Beautiful meets cutter and stapler

It was almost bedtime for the little guys when I suddenly felt it - the undeniable allure of a new project!  I held off long enough to tuck them in, just barely. It only took me a few moments to gather my supplies and literally less than 10 minutes to make the first one - the second one took more like 5 minutes! 


I used the tutorial linked below to make these.  They're super simple, adorable, infinitely changeable (different colors, textures, widths, etc...) and free, if you've got a couple of basic tools on  hand.

I used a paper cutter to make cutting the strips easier, though you could use scissors if you're patient and good at cutting straight lines, but it'll take much longer.  A few staples to hold the twists together and then double sided photo squares, like the kind for scrapbooking, to put the twists together and you're done!

I think these are so cute and simple and they're a great way to use up old magazine or catalog pages!  I happened to have an old issue of House Beautiful laying around that fit the bill perfectly!  The only thing to consider, really, is that smaller pages will make smaller bows.

http://howaboutorange.blogspot.com/2009/10/make-gift-bow-from-magazine-page.html

There's the link for the tutorial - I'd love to see pictures of any bows you make!

EDIT:
9/29/10 - I did several more of these yesterday, trying some other widths and materials.  When I used 1 inch wide strips, the bow felt a little fuller, but I had to use a piece from another page for the center, because I didn't have enough width to make 9 strips.
I also tried with scrapbook paper (not card stock) and it worked out beautifully, except that the paper is slightly heavier and the double sided tape squares weren't quite sticky enough to hold it together - it kept wanting to pop apart.  Next time I'll try using glue dots or another strong adhesive.