Thursday, December 30, 2010

Of few words

Garlic Herb Braid

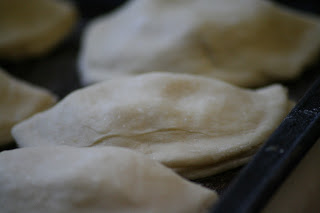
Pierogies - shaped, but not cooked
Pierogies boiling

Fried in butter

YUM - and those little black specks?  Fresh ground black pepper, Baby!

And a little teaser for an upcoming post...

Sugar Overload!


Sunday, December 19, 2010

Pop Tarts

A while back I stumbled onto a recipe for Pop Tarts, so of course I printed it and tucked it away in my binder, where it languished for quite a long time.  Yesterday I thought of it again and intended to make them, but just didn't get around to it. 

So this morning, after my traditional Sunday morning breakfast of pancakes and raspberry jam, I decided the time had come.  I cracked out my recipe binder and whipped up a batch of raspberry Pop Tarts.


Here is the recipe I used.  I followed the directions pretty exactly, except for one thing.  Somehow my brain read 4 X 3 rectangles as "make 12 rectangles" instead of 9 rectangles of those dimensions...so my Tarts are a bit smaller than the original recipe called for.

A few things to note, if you're thinking of making these, too...
  • The dough is very soft and a little tempermental - it doesn't respond well to a warm environment due to the high butter content.  Try to keep your hands cool while you're working with the dough and don't be afraid to refrigerate or freeze the dough as needed.
  • Possibly due to the smaller size of my Tarts, I didn't use anywhere near the amount of filling called for.  I had about 1/3 of the raspberry jam leftover, so you might consider cutting down the amount you use, or putting more filling in each one (although that might cause some leakage, so try this at your own risk).
  • The dough stuck to the counter pretty well, so an offset spatula was needed to get the rectangles off the counter without tearing them.  Next time I will either roll the dough out between sheets of wax paper or I'll use a bit more flour on the counter.  Either way, I'll keep my offset spatula handy.
  • I used a fork to prick the top dough, but the jam filling seemed to seal the holes back up, so my Tarts were quite puffy.  Next time I'll try poking more holes in the dough and possibly using a toothpick instead of a fork. 
  • The recipe doesn't talk about icings at all.  I thought they were quite delicious without any icing, but Bryant really does prefer it.  I would probably use a simple powdered sugar glaze if I were going to eat them right away.  For longer storage or a truer Pop Tart experience, a royal icing would work better. 

Thursday, December 16, 2010

In which we discuss knitting...

As I sat down with my computer this morning I thought to myself, "I know I should blog, but there's just nothing going on."  And then I thought of Simon Pegg's character in Hot Fuzz - "There is always something going on!"  So...

Gift knitting is going fairly well.  I'm cutting it down to the wire, as usual.  My last two projects are in the works, one is just over half done, the other is just shy of it.  Both are simple enough that I can pick them up and put them down as I want to, which might be part of my problem.  It's easy to put them down whenever I feel like it because I know I can just pick them back up when I have a moment.  So I put them down far too often...  I'll do a post about the individual projects after they've reached their intended owners.

I'm already itching to start my post-Christmas sock knitting!  My sister-in-law gave me some gorgeous sock yarn this summer and I can't wait to start turning it into socks for myself.  The pattern I chose is called Mockery (which I thought was pretty fitting for me) and should show off the yarn nicely.  The yarn is here and is actually the colorway pictured at the top - Invercargill #1810.  Gorgeous!  And it's super soft and delicious!

When those are done I'll be working on Mandie and Caleb's wedding afghan.  She chose the pattern and yarn (a complete departure from Reva and Michael's afghan - I chose the pattern and yarn and they had no idea I was making it).  The yarn is white with green, blue and copper flecks - very pretty!  When I knit Reva and Michael's afghan, the focus was on the twists and curves of the cables; the yarn was really just a vehicle for displaying the stitches.  Mandie and Caleb's afghan has a very simple stitch pattern, so the focus is on the yarn instead.  I'm excited to see how it looks all knit up!

Huh.  Apparently I had something to say after all...


Wednesday, December 15, 2010

Monkey Bread from scratch

This is the recipe I turn to when I want monkey bread, but I want to make it myself.  It does take a couple of hours, so it's not ideal for breakfast, but it makes a deliciously sticky brunch addition or snack.

Monkey Bread
Serves 10 (small servings) or 4-5 (serious appetite and sweet tooth)

1/4 C warm water - I use the hottest water my kitchen tap will give me
2 1/2 tsp yeast (or one packet, if that's more your style)
3 - 3 1/2 C all purpose flour
1 tsp salt
1/2 tsp vanilla - I never measure vanilla, just drizzle a bit in
3 Tbsp granulated sugar
1 large egg
2 Tbsp butter, melted
3/4 C milk, warmed

2 C brown sugar
1 1/2 Tbsp ground cinnamon
1/2 tsp allspice
1/2 C butter, melted

In a large mixing bowl, combine water and yeast.  Let that sit for a few minutes to let the yeast soak and get a little foamy.  Stir in 1 C of the flour, salt, sugar, vanilla, egg, 2 T melted butter and warmed milk, stir well to combine and remove most lumps.  If you're using a stand mixer, pop on the dough hook now; if not, just use your hands.  That's what I do.

Gradually add in the rest of the flour, mixing at medium speed until the dough comes together and pulls away from the sides of the bowl.  Knead for 3-4 minutes at medium speed (or knead by hand for 6 - 8 minutes).  Remove dough hook or put the dough back into your mixing bowl, cover with plastic wrap and let the dough rest for 30 minutes.  It's tough work being kneaded so much, your dough needs a nap.  Do not deprive the dough of it's nap - it's like a cranky toddler at this point.  If it doesn't get adequate down-time, it'll only cause you more trouble later.

When nap time is over, whisk together the brown sugar and spices, taking care to get rid of any large clumps of sugar.  Pour the melted butter into a small bowl and get both bowls, the dough and your Bundt pan together.  Grease that pan like there's no tomorrow - you really want the bread to just slide right out, so don't skimp on the Pam. 

Gently degas the dough and pull off a small piece of dough (enough to make a 1/2 inch ball).  Roll the dough gently between your palms to form a ball and dip the ball in butter.  Let the excess butter (is that an oxymoron?) drip off, then give the ball a quick roll in the sugar and spice mix.  Once the ball is coated, drop it into your Bundt pan.  Repeat until you're out of dough.  And don't stress about the dough balls being exactly even, just try not to let them all pile up on one side of the pan. 

When you're done rolling and coating the balls, loosely cover the pan with plastic wrap and let the dough rise in a warm spot for an hour or until the dough is about doubled in size.

Preheat the oven to 350 degrees.  Bake the bread for 30-35 minutes - it's spring back when lightly touched when it's done.

Let the bread cool in the pan for about 10 minutes, then turn it out onto your serving plate (I usually turn it out into my cake carrier - that way if we don't finish it all right away I can just pop the top on and it's put away for later).

Eat immediately.  Sharing is optional.

Tuesday, December 14, 2010

Snowy Day

View from the living room window.


The bird feeder Bryant and I made this summer is covered in snow!
 While it's snowing like crazy outside, I wanted to try my hand at making 3D paper snowflakes.  I've seen them made of paper and felt.  The felt ones looked a little too sturdy for my taste, but the paper ones are light and fluffy and perfect.  I am still working my way through the Simplicity catalog, so I grabbed six more pages, cut them down into six inch squares and after a bit of folding, cutting, taping and stapling....


Paper snowflake

I know it looks a little complicated, but these are seriously simple to make.  And mine is huge - I used six inch squares, so my total width is about 12 inches.  Next time I'm going to try using three inch squares of paper.

Backlit

There's a back lit view, just because I liked it.  : )   I think the silhouette gives you a little better sense of the folds, too.

If you're interested in making your own, here is a link to the tutorial I used.  I'd love to see pictures if you do make some!

Completely unrelated, while I was taking the pictures of the snow, this guy showed up and let me snap a few photos. 


Monday, December 13, 2010

Overnight Cinnamon Rolls

Christmas morning is a magical time and one thing that makes it even more magical, in my opinion, is warm cinnamon rolls.  But they can be very work intensive and often take a long time to rise, making them a less than perfect choice for such a busy morning. 

So here's my recipe for Overnight Cinnamon Rolls.  They are exactly what they sound like - cinnamon rolls you make the night before you want them.  Perfect.

Overnight Cinnamon Rolls
Serves 12

1 C milk (I use skim because it's what I keep on hand)
1/3 C butter
2 1/4 tsp yeast (or one packet)
1/2 C granulated sugar
4 1/2 C all purpose flour
1 tsp salt
3 eggs
3/4 C brown sugar
1 T ground cinnamon
1/2 C raisins, optional

Glaze:
1 tsp light corn syrup
1/2 tsp vanilla extract
1 1/4 C confectioner's sugar
2 T half and half or cream or milk

Heat the milk in a small saucepan until it begins to bubble, then remove from heat and add the butter to the milk.  Stir that around until the butter melts; let it cool until lukewarm.

Pour the tepid milk into a large mixing bowl and add the yeast to dissolve (allow it to sit for a few minutes, just so it gets nice and soft).  Add the sugar, 3 C of flour, salt and eggs; stir very well to combine.  Add the remaining flour, 1/2 C at a time, stirring well after each addition.  When the dough pulls together, dump it out onto a well floured table or counter and knead until it's smooth and supple, about 8 minutes.

Lightly oil or use non-stick cooking spray on a large mixing bowl.  Plop the dough into the bowl and turn it over to coat the dough with spray or oil.  Cover with a clean, damp dishcloth (wash your hands after you knead the dough and dry them on a clean cloth - use that cloth to cover the dough) and let the dough rise in a warm place until it doubles in volume, about an hour or so.  We keep our house quite cool, so I turn the oven on to 200 degrees, turn it off once it reaches the temp and set the dough on the back of the stove to rise.

Dump the risen dough out onto a lightly floured surface and punch it down a few times.  Roll the dough into an approximately 10 X 14 rectangle.  Combine the brown sugar, cinnamon and raisins (if you're using them.  Mom, you'll be happy to know I don't use them in this.) in a small bowl and spread that mix over the rolled out dough.  If you like nuts in your cinnamon rolls, this is where you'd add them, too.  Any kind of coarse chopped nuts would work here, so use whatever you like or have on hand.

Roll the dough up into a log, sealing the edge.  If the dough doesn't want to stick to itself, brush a bit of cold water onto the edge with your fingers, then press the dough together.  Cut the log into 12 even pieces, then lay the pieces down in a well greased 9 X 13.  Cover and let rise in the fridge overnight.  If you have a full fridge and a very cold spot in the house, feel free to use that.  Our entryway is not insulated and gets quite cold, so if my fridge is overly full (like at Christmas time) I just leave the pan of rolls out there overnight.

In the morning, set the rolls out on the counter or table (someplace reasonably warm) for 30 minutes.  Preheat the oven to 375 degrees and bake the rolls for 25 - 30 minutes.  While they're baking, mix the glaze ingredients together in a small bowl, stirring well.  Adjust the thickness of the glaze by adding more sugar to make it thicker or more milk to thin it out.  I like mine pretty thick, so I usually add a bit more powdered sugar or a smidge less milk. 

Let the rolls sit for 10 minutes when they come out of the oven, then pour the glaze over, letting it seep down into the cracks and folds of the dough.  These are amazing warm and really good at room temp, so serve them whenever you feel like it. 

I love the simplicity of this recipe and make these fairly often as a birthday breakfast or holiday treat. 

Thursday, December 9, 2010

Christmas Village

I have a fairly extensive Halloween village complete with quite a few buildings, stand alone figurines, trees and a custom built base.  What I don't have is any desire for a Christmas village.

Until I saw this.  


My house
 These are printed on regular printer paper, but I imagine that on card stock they'd be a little more sturdy and the folds would be neater.  If you follow that link above, you'll see that this house is free and the artist also offers a pack for purchase.  The purchasable pack includes three more buildings and several free-standing trees.  I'm seriously considering buying them.

Scooter's house - I love the blue on the icicles!


She used three shades of red to achieve a realistic brick effect!

Pibb's house - "under construction"
Pookie's house
The Boy opted not to participate in this activity and Midge has already colored three houses, but he's not happy with any of them, so he's asked me not to post photos.  These pretty little houses are currently decorating the television stand next to my Matryoshka dolls (Bryant bought them for me).


I know that picture is kind of random, I just wanted to show them off...   : )

Tuesday, December 7, 2010

Pizza Rolls

I adore pizza - in pretty much every format.  I love the crust - thick or thin, white or whole wheat, baked or grilled.  I love the sauce - thick and tangy or thin and sweet.  I also love pizza flavored things - from pizza pancakes dipped in warmed pizza sauce to pizza seasonings on popcorn. 

I am a pizza fanatic.

So when I stumbled onto the idea of homemade pizza rolls, I was hooked.  Totino's Pizza Rolls are great for snacking or when we need a super quick dinner, but I thought I could probably make them healthier and I love making homemade versions of store bought foods.  These aren't quite the same as Totino's, they're more like pizza crust dinner rolls with the toppings all stuffed inside - delicious. 

Here's my "recipe" for pizza rolls...

For 48 rolls you'll need enough pizza crust for two pizzas (homemade or refrigerated roll-out crust); sauce (my recipe is here); cheese (moz or a blend); 2 Tbsp butter (melted); Italian seasoning, garlic powder or Garlic Bread Seasoning and whatever pizza toppings you like.  We used ham, pepperoni and onion, but the possibilities are virtually endless.

Preheat oven to whatever temperature your dough calls for.  If you're not sure, 400 or 425 is usually a good starting point.

Roll each crust into a 9X13 rectangle, trying to keep the thickness relatively even.  Use your pizza cutter to slice each crust into 24 small squares.  Top each square with a small amount of cheese and toppings - leave the sauce out - that's for dipping.  Fold up the edges and roll between your palms to seal the edges.  Arrange stuffed balls in a greased 9X13, just touching. 

When you have all the balls rolled and ready, give them a quick wipe down with the melted butter and sprinkle on the seasonings - how much you use is up to you.  I just eyeballed it, probably about a tablespoon, I think. 

Bake them for about 15 minutes, but check them after 10, just in case.  They should get a little golden and feel "crusty" when they're done.  While they're baking, heat up your sauce.  Allow the rolls to cool for a few moments before you bite into them - just trust me on this one - the hot cheese will burn your mouth. 

Dip rolls into warm sauce and devour. 

Friday, December 3, 2010

Kusudama


These are the kusudama flowers I've made in the last two days - aren't they gorgeous?  I love them! 


I've been using pages from old sewing pattern catalogs, so my flowers have an almost fabric-like look. 
If I'm making a small flower, I can get all the petals from one page, so the color schemes
often compliment each other.


Tragedy!

Cardstock was a bit too heavy.  The paper cut and folded nicely, but my double sided
photo squares weren't strong enough to hold it together. 


I hate photos that don't give you any scale, so I'm including this one of my camera lens cover.  The small flowers were made with 3 inch squares of paper, the large ones were 6 inch squares.  Each flower has six petals - but the large flowers are slightly different.  On the left one I used the standard directions. 
 The one on the right, I tried the alternate directions - the result was a flower with only a single 'point'
in the center of each petal.

If you've got a few minutes and you're feeling crafty, I highly recommend this tutorial

 Be forewarned, though; these are addictive.  I've had an old Simplicity pattern book on my dining room table for a couple of days and each time I walk past, I feel compelled to rip out a page
and fold a petal or two. 

Last night Bryant and I were at a fast food place and I tried to fold my napkin into a flower
 (flimsy paper and a not quite real square made it virtually impossible)!

If you do make some, I'd love to see them, so snap a picture for me, okay?