Thursday, December 30, 2010

Of few words

Garlic Herb Braid

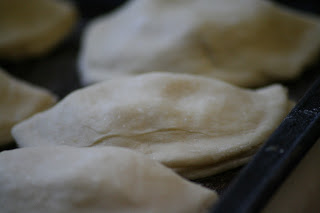
Pierogies - shaped, but not cooked
Pierogies boiling

Fried in butter

YUM - and those little black specks?  Fresh ground black pepper, Baby!

And a little teaser for an upcoming post...

Sugar Overload!


Sunday, December 19, 2010

Pop Tarts

A while back I stumbled onto a recipe for Pop Tarts, so of course I printed it and tucked it away in my binder, where it languished for quite a long time.  Yesterday I thought of it again and intended to make them, but just didn't get around to it. 

So this morning, after my traditional Sunday morning breakfast of pancakes and raspberry jam, I decided the time had come.  I cracked out my recipe binder and whipped up a batch of raspberry Pop Tarts.


Here is the recipe I used.  I followed the directions pretty exactly, except for one thing.  Somehow my brain read 4 X 3 rectangles as "make 12 rectangles" instead of 9 rectangles of those dimensions...so my Tarts are a bit smaller than the original recipe called for.

A few things to note, if you're thinking of making these, too...
  • The dough is very soft and a little tempermental - it doesn't respond well to a warm environment due to the high butter content.  Try to keep your hands cool while you're working with the dough and don't be afraid to refrigerate or freeze the dough as needed.
  • Possibly due to the smaller size of my Tarts, I didn't use anywhere near the amount of filling called for.  I had about 1/3 of the raspberry jam leftover, so you might consider cutting down the amount you use, or putting more filling in each one (although that might cause some leakage, so try this at your own risk).
  • The dough stuck to the counter pretty well, so an offset spatula was needed to get the rectangles off the counter without tearing them.  Next time I will either roll the dough out between sheets of wax paper or I'll use a bit more flour on the counter.  Either way, I'll keep my offset spatula handy.
  • I used a fork to prick the top dough, but the jam filling seemed to seal the holes back up, so my Tarts were quite puffy.  Next time I'll try poking more holes in the dough and possibly using a toothpick instead of a fork. 
  • The recipe doesn't talk about icings at all.  I thought they were quite delicious without any icing, but Bryant really does prefer it.  I would probably use a simple powdered sugar glaze if I were going to eat them right away.  For longer storage or a truer Pop Tart experience, a royal icing would work better. 

Thursday, December 16, 2010

In which we discuss knitting...

As I sat down with my computer this morning I thought to myself, "I know I should blog, but there's just nothing going on."  And then I thought of Simon Pegg's character in Hot Fuzz - "There is always something going on!"  So...

Gift knitting is going fairly well.  I'm cutting it down to the wire, as usual.  My last two projects are in the works, one is just over half done, the other is just shy of it.  Both are simple enough that I can pick them up and put them down as I want to, which might be part of my problem.  It's easy to put them down whenever I feel like it because I know I can just pick them back up when I have a moment.  So I put them down far too often...  I'll do a post about the individual projects after they've reached their intended owners.

I'm already itching to start my post-Christmas sock knitting!  My sister-in-law gave me some gorgeous sock yarn this summer and I can't wait to start turning it into socks for myself.  The pattern I chose is called Mockery (which I thought was pretty fitting for me) and should show off the yarn nicely.  The yarn is here and is actually the colorway pictured at the top - Invercargill #1810.  Gorgeous!  And it's super soft and delicious!

When those are done I'll be working on Mandie and Caleb's wedding afghan.  She chose the pattern and yarn (a complete departure from Reva and Michael's afghan - I chose the pattern and yarn and they had no idea I was making it).  The yarn is white with green, blue and copper flecks - very pretty!  When I knit Reva and Michael's afghan, the focus was on the twists and curves of the cables; the yarn was really just a vehicle for displaying the stitches.  Mandie and Caleb's afghan has a very simple stitch pattern, so the focus is on the yarn instead.  I'm excited to see how it looks all knit up!

Huh.  Apparently I had something to say after all...


Wednesday, December 15, 2010

Monkey Bread from scratch

This is the recipe I turn to when I want monkey bread, but I want to make it myself.  It does take a couple of hours, so it's not ideal for breakfast, but it makes a deliciously sticky brunch addition or snack.

Monkey Bread
Serves 10 (small servings) or 4-5 (serious appetite and sweet tooth)

1/4 C warm water - I use the hottest water my kitchen tap will give me
2 1/2 tsp yeast (or one packet, if that's more your style)
3 - 3 1/2 C all purpose flour
1 tsp salt
1/2 tsp vanilla - I never measure vanilla, just drizzle a bit in
3 Tbsp granulated sugar
1 large egg
2 Tbsp butter, melted
3/4 C milk, warmed

2 C brown sugar
1 1/2 Tbsp ground cinnamon
1/2 tsp allspice
1/2 C butter, melted

In a large mixing bowl, combine water and yeast.  Let that sit for a few minutes to let the yeast soak and get a little foamy.  Stir in 1 C of the flour, salt, sugar, vanilla, egg, 2 T melted butter and warmed milk, stir well to combine and remove most lumps.  If you're using a stand mixer, pop on the dough hook now; if not, just use your hands.  That's what I do.

Gradually add in the rest of the flour, mixing at medium speed until the dough comes together and pulls away from the sides of the bowl.  Knead for 3-4 minutes at medium speed (or knead by hand for 6 - 8 minutes).  Remove dough hook or put the dough back into your mixing bowl, cover with plastic wrap and let the dough rest for 30 minutes.  It's tough work being kneaded so much, your dough needs a nap.  Do not deprive the dough of it's nap - it's like a cranky toddler at this point.  If it doesn't get adequate down-time, it'll only cause you more trouble later.

When nap time is over, whisk together the brown sugar and spices, taking care to get rid of any large clumps of sugar.  Pour the melted butter into a small bowl and get both bowls, the dough and your Bundt pan together.  Grease that pan like there's no tomorrow - you really want the bread to just slide right out, so don't skimp on the Pam. 

Gently degas the dough and pull off a small piece of dough (enough to make a 1/2 inch ball).  Roll the dough gently between your palms to form a ball and dip the ball in butter.  Let the excess butter (is that an oxymoron?) drip off, then give the ball a quick roll in the sugar and spice mix.  Once the ball is coated, drop it into your Bundt pan.  Repeat until you're out of dough.  And don't stress about the dough balls being exactly even, just try not to let them all pile up on one side of the pan. 

When you're done rolling and coating the balls, loosely cover the pan with plastic wrap and let the dough rise in a warm spot for an hour or until the dough is about doubled in size.

Preheat the oven to 350 degrees.  Bake the bread for 30-35 minutes - it's spring back when lightly touched when it's done.

Let the bread cool in the pan for about 10 minutes, then turn it out onto your serving plate (I usually turn it out into my cake carrier - that way if we don't finish it all right away I can just pop the top on and it's put away for later).

Eat immediately.  Sharing is optional.

Tuesday, December 14, 2010

Snowy Day

View from the living room window.


The bird feeder Bryant and I made this summer is covered in snow!
 While it's snowing like crazy outside, I wanted to try my hand at making 3D paper snowflakes.  I've seen them made of paper and felt.  The felt ones looked a little too sturdy for my taste, but the paper ones are light and fluffy and perfect.  I am still working my way through the Simplicity catalog, so I grabbed six more pages, cut them down into six inch squares and after a bit of folding, cutting, taping and stapling....


Paper snowflake

I know it looks a little complicated, but these are seriously simple to make.  And mine is huge - I used six inch squares, so my total width is about 12 inches.  Next time I'm going to try using three inch squares of paper.

Backlit

There's a back lit view, just because I liked it.  : )   I think the silhouette gives you a little better sense of the folds, too.

If you're interested in making your own, here is a link to the tutorial I used.  I'd love to see pictures if you do make some!

Completely unrelated, while I was taking the pictures of the snow, this guy showed up and let me snap a few photos. 


Monday, December 13, 2010

Overnight Cinnamon Rolls

Christmas morning is a magical time and one thing that makes it even more magical, in my opinion, is warm cinnamon rolls.  But they can be very work intensive and often take a long time to rise, making them a less than perfect choice for such a busy morning. 

So here's my recipe for Overnight Cinnamon Rolls.  They are exactly what they sound like - cinnamon rolls you make the night before you want them.  Perfect.

Overnight Cinnamon Rolls
Serves 12

1 C milk (I use skim because it's what I keep on hand)
1/3 C butter
2 1/4 tsp yeast (or one packet)
1/2 C granulated sugar
4 1/2 C all purpose flour
1 tsp salt
3 eggs
3/4 C brown sugar
1 T ground cinnamon
1/2 C raisins, optional

Glaze:
1 tsp light corn syrup
1/2 tsp vanilla extract
1 1/4 C confectioner's sugar
2 T half and half or cream or milk

Heat the milk in a small saucepan until it begins to bubble, then remove from heat and add the butter to the milk.  Stir that around until the butter melts; let it cool until lukewarm.

Pour the tepid milk into a large mixing bowl and add the yeast to dissolve (allow it to sit for a few minutes, just so it gets nice and soft).  Add the sugar, 3 C of flour, salt and eggs; stir very well to combine.  Add the remaining flour, 1/2 C at a time, stirring well after each addition.  When the dough pulls together, dump it out onto a well floured table or counter and knead until it's smooth and supple, about 8 minutes.

Lightly oil or use non-stick cooking spray on a large mixing bowl.  Plop the dough into the bowl and turn it over to coat the dough with spray or oil.  Cover with a clean, damp dishcloth (wash your hands after you knead the dough and dry them on a clean cloth - use that cloth to cover the dough) and let the dough rise in a warm place until it doubles in volume, about an hour or so.  We keep our house quite cool, so I turn the oven on to 200 degrees, turn it off once it reaches the temp and set the dough on the back of the stove to rise.

Dump the risen dough out onto a lightly floured surface and punch it down a few times.  Roll the dough into an approximately 10 X 14 rectangle.  Combine the brown sugar, cinnamon and raisins (if you're using them.  Mom, you'll be happy to know I don't use them in this.) in a small bowl and spread that mix over the rolled out dough.  If you like nuts in your cinnamon rolls, this is where you'd add them, too.  Any kind of coarse chopped nuts would work here, so use whatever you like or have on hand.

Roll the dough up into a log, sealing the edge.  If the dough doesn't want to stick to itself, brush a bit of cold water onto the edge with your fingers, then press the dough together.  Cut the log into 12 even pieces, then lay the pieces down in a well greased 9 X 13.  Cover and let rise in the fridge overnight.  If you have a full fridge and a very cold spot in the house, feel free to use that.  Our entryway is not insulated and gets quite cold, so if my fridge is overly full (like at Christmas time) I just leave the pan of rolls out there overnight.

In the morning, set the rolls out on the counter or table (someplace reasonably warm) for 30 minutes.  Preheat the oven to 375 degrees and bake the rolls for 25 - 30 minutes.  While they're baking, mix the glaze ingredients together in a small bowl, stirring well.  Adjust the thickness of the glaze by adding more sugar to make it thicker or more milk to thin it out.  I like mine pretty thick, so I usually add a bit more powdered sugar or a smidge less milk. 

Let the rolls sit for 10 minutes when they come out of the oven, then pour the glaze over, letting it seep down into the cracks and folds of the dough.  These are amazing warm and really good at room temp, so serve them whenever you feel like it. 

I love the simplicity of this recipe and make these fairly often as a birthday breakfast or holiday treat. 

Thursday, December 9, 2010

Christmas Village

I have a fairly extensive Halloween village complete with quite a few buildings, stand alone figurines, trees and a custom built base.  What I don't have is any desire for a Christmas village.

Until I saw this.  


My house
 These are printed on regular printer paper, but I imagine that on card stock they'd be a little more sturdy and the folds would be neater.  If you follow that link above, you'll see that this house is free and the artist also offers a pack for purchase.  The purchasable pack includes three more buildings and several free-standing trees.  I'm seriously considering buying them.

Scooter's house - I love the blue on the icicles!


She used three shades of red to achieve a realistic brick effect!

Pibb's house - "under construction"
Pookie's house
The Boy opted not to participate in this activity and Midge has already colored three houses, but he's not happy with any of them, so he's asked me not to post photos.  These pretty little houses are currently decorating the television stand next to my Matryoshka dolls (Bryant bought them for me).


I know that picture is kind of random, I just wanted to show them off...   : )

Tuesday, December 7, 2010

Pizza Rolls

I adore pizza - in pretty much every format.  I love the crust - thick or thin, white or whole wheat, baked or grilled.  I love the sauce - thick and tangy or thin and sweet.  I also love pizza flavored things - from pizza pancakes dipped in warmed pizza sauce to pizza seasonings on popcorn. 

I am a pizza fanatic.

So when I stumbled onto the idea of homemade pizza rolls, I was hooked.  Totino's Pizza Rolls are great for snacking or when we need a super quick dinner, but I thought I could probably make them healthier and I love making homemade versions of store bought foods.  These aren't quite the same as Totino's, they're more like pizza crust dinner rolls with the toppings all stuffed inside - delicious. 

Here's my "recipe" for pizza rolls...

For 48 rolls you'll need enough pizza crust for two pizzas (homemade or refrigerated roll-out crust); sauce (my recipe is here); cheese (moz or a blend); 2 Tbsp butter (melted); Italian seasoning, garlic powder or Garlic Bread Seasoning and whatever pizza toppings you like.  We used ham, pepperoni and onion, but the possibilities are virtually endless.

Preheat oven to whatever temperature your dough calls for.  If you're not sure, 400 or 425 is usually a good starting point.

Roll each crust into a 9X13 rectangle, trying to keep the thickness relatively even.  Use your pizza cutter to slice each crust into 24 small squares.  Top each square with a small amount of cheese and toppings - leave the sauce out - that's for dipping.  Fold up the edges and roll between your palms to seal the edges.  Arrange stuffed balls in a greased 9X13, just touching. 

When you have all the balls rolled and ready, give them a quick wipe down with the melted butter and sprinkle on the seasonings - how much you use is up to you.  I just eyeballed it, probably about a tablespoon, I think. 

Bake them for about 15 minutes, but check them after 10, just in case.  They should get a little golden and feel "crusty" when they're done.  While they're baking, heat up your sauce.  Allow the rolls to cool for a few moments before you bite into them - just trust me on this one - the hot cheese will burn your mouth. 

Dip rolls into warm sauce and devour. 

Friday, December 3, 2010

Kusudama


These are the kusudama flowers I've made in the last two days - aren't they gorgeous?  I love them! 


I've been using pages from old sewing pattern catalogs, so my flowers have an almost fabric-like look. 
If I'm making a small flower, I can get all the petals from one page, so the color schemes
often compliment each other.


Tragedy!

Cardstock was a bit too heavy.  The paper cut and folded nicely, but my double sided
photo squares weren't strong enough to hold it together. 


I hate photos that don't give you any scale, so I'm including this one of my camera lens cover.  The small flowers were made with 3 inch squares of paper, the large ones were 6 inch squares.  Each flower has six petals - but the large flowers are slightly different.  On the left one I used the standard directions. 
 The one on the right, I tried the alternate directions - the result was a flower with only a single 'point'
in the center of each petal.

If you've got a few minutes and you're feeling crafty, I highly recommend this tutorial

 Be forewarned, though; these are addictive.  I've had an old Simplicity pattern book on my dining room table for a couple of days and each time I walk past, I feel compelled to rip out a page
and fold a petal or two. 

Last night Bryant and I were at a fast food place and I tried to fold my napkin into a flower
 (flimsy paper and a not quite real square made it virtually impossible)!

If you do make some, I'd love to see them, so snap a picture for me, okay?

Wednesday, November 24, 2010

Spicy Vanilla Pecans

Every year on the day after Thanksgiving, while the men watch football, hunt or eat leftover pumpkin pie, the ladies in my family gather at Gram's for Craft Day.  We get together for a day of food, socializing and craftiness.  Some people will bring craft supplies (specific to the chosen crafts) and others will bring food.  I usually bring both.

This year I'm bringing Spicy Vanilla Pecans to share.  When Bryant saw the tub of them this morning, he playfully demanded to know where his were, so I started another batch for him and the boys to eat while we're crafting. 

This recipe is from Gooseberry Patch Christmas, book 9. 

Spicy Vanilla Pecans
1 lb pecan halves
6 C water
1/2 C sugar
3 T butter, melted
1 T corn syrup
1 T vanilla extract
1/4 tsp salt
1/4 tsp cinnamon
1/4 tsp nutmeg
1/4 tsp allspice
1/8 tsp black pepper

Throw the pecans into boiling water for one full minute; drain.  Immediately toss pecans in a large bowl with sugar, butter, corn syrup and vanilla; mix well.  Cover bowl and let sit 12 - 24 hours.  I usually draw a stop sign on a Post-It note so the kids know not to pick at them.

The next day, dump pecans on an ungreased cookie sheet, spread into a single layer and bake at 325 for 30 minutes, stirring every 5 minutes.  While pecans are baking, combine the spices in a large bowl.  As soon as the pecans come out of the oven, toss them in the bowl with the spices and stir until they're well coated.  Spread pecans on a cookie sheet in a single layer and allow them to cool completely before storing in a airtight container at room temperature.  I have no idea how long these will last - the original recipe didn't note how long you could keep them and they've never lasted more than a few days here.

Makes about 5 1/2 C.

Tuesday, November 23, 2010

The Coolest

Most parents think their kids are the most beautiful, the most wonderful, the most amazing.  I am certain that my daughter is the coolest preteen girl in the world (at least in my world).  While I was reviewing her schoolwork from yesterday, I ran across her "Top 10 Things I'm Thankful For" list.  Nestled gently between "My map making skills" and "My own bedroom" I found "My library card."

Her library card is the #8 thing she's thankful for - in the whole wide world! 

Man, I love that kid!

Monday, November 22, 2010

In my field of paper flowers...

Oh, delight!  I just made a paper lily!  I know it's silly - it's just a bit of folded paper, but I'm super excited and pleased with how this turned out. 


If I were making these for a project I would use a different paper - I just grabbed a sheet from my stash of 12 X 12 scrapbook paper.  I would probably use a solid or semi-solid color and perhaps I'd use a slightly thinner paper.  This turned out really well, though and the size is exactly what I was looking for.

If you're interested in making your own, here is a link to the tutorial I used.

Camera Randomness

This morning I took a few pictures for posting here.  When I dumped the images from the camera onto my computer, I realized I had a few different posts worth of photos.  Instead of doing several different posts, I'm going to post a bit of randomness from the last week or so.


We took the kids to the park so they could play and I could practice controlling the depth of field in my photographs.  Bryant's very good with the technical stuff, so he's been teaching me how to get the photos I want.  Fun!

I made these Skillet Smashed Potatoes for breakfast one day - they were amazing!  I parboiled them the night before and stuck them in the fridge overnight.  When I was ready to cook them, I melted some butter and heated a bit of olive oil in a large skillet, then put in a few potatoes (these were small red skins, but I think fingerling or yellow potatoes would work, too) and smashed them with the bottom of my large glass measuring cup.  They cooked until the bottoms were golden and crisp, then I flipped them, cooked them until they were heated through and the other side was crisp.  I served them alongside eggs (over-easy pictured) and we all enjoyed them very much (except Midge - but he doesn't eat potatoes except fast food fries).


I made a banana cake (my first "from scratch" banana cake) for Bryant's birthday and Pookie helped decorate it.  He spread the icing on (although I helped with the sides) and we used a Pampered Chef cake stencil and cocoa powder to "write" on the cake.  It was really fun to watch him slide the frosting around and being so careful with the stencil!  He's such a cutie and he wants to help so very much lately - it's wonderful!  Although I will admit that instead of letting him help make the cake, I gave him a few extra minutes of video game time so I could cook in peace.  Such is life...


And finally, caramels! I received a candy thermometer for my birthday this year and I've been a little scared to try it out.  Really, I'm terrified of boiling sugar!  But I've been wanting to make caramels and Bryant agreed to supervise and tell me if I was going to do something stupid, so last night we cracked out the thermometer and made magic.  Er, made caramels.  They're really so close to the same thing...

We used this recipe.  As my first time making caramels, I though it went really well.  It took longer than I would have thought to bring the caramel up to the proper temperature - we both kept second guessing the amount of heat under the pan.  But in the end, it came up to temp easily enough and we poured the super hot liquid sugar into an 8 x 8 Pyrex to set overnight.

This morning I struggled with them a little.  The foil I used to line the pan didn't want to release the caramel and was just pulling and stretching it at the edges.  I ended up having to use a sharp knife to slice the foil off the caramel after I'd cut it into sticks.  Then it was just a matter of cutting them into good size pieces and wrapping them in a bit of waxed paper.  We ended up with 65 caramels (instead of the 80 the recipe claimed we'd get), but I suspect the lower number has as much to do with cutting the foil off as it does with variations in size. 

All in all, I'm pretty pleased with how they turned out.  And since I'd been wanting to make them for a long time, I'm glad I finally got up the gumption to just do it.  So often I make up my mind that I can't do something or that it'll be too hard and then I just don't try.  I've recognized this as a flaw in my character and am working hard on not letting it get me down.  If I want to try something, I'm getting better at just trying it, instead of stewing about it and allowing my insecurities to convince me I will fail. 

So far, so good.

Thursday, November 18, 2010

Maple & Spice Popcorn

When I was young, probably somewhere around 9 or 10, I nearly burned down my parents' house making popcorn on the stove.  I put the oil on to heat, got distracted and set the kitchen on fire.  No one was hurt and the damage wasn't extreme, but I resolved never to make popcorn on the stove again. 

And for over 20 years, I didn't.  When our microwave went to that big junkyard in the sky we decided not to buy another one.  We'd used it for things like melting cheese over chips, warming leftovers and, of course, popcorn.  And with the price of microwave popcorn, we weren't using it all that much.

After a year or so of being without a microwave, I really wanted popcorn again.  So I decided to try doing it on the stovetop, but only if Bryant supervised the first time or two.  He  laughed at me for being so nervous, but he did it - he's cool like that.

That first bite of hot, salty, buttery popcorn was enough to convert me.  I went to Sam's Club the following week and bought a huge bag (50 pounds) of popcorn kernels and a large tub to hold it in.  In the year or so since then, we've used about 1/4 of that popcorn and have tried many different seasonings from parmesan and garlic to caramel corn. 

I was cruising the blogosphere a few days ago when I caught the idea of using maple syrup on popcorn.  WHOA!  I'd never thought of such a thing! I cracked out the popcorn right then.  Scooter mixed up a tasty little spice blend while I popped the corn.  When the corn was popped, I drizzled it with a mix of melted butter and syrup, then tossed in some of the spices and mixed it all up. 

It was amazing!  It was a revelation!  It was autumn-flavored popcorn!  I recommend you try this as soon as possible.

Maple and Spice Popcorn
Makes enough for two adults or several snack-size nibbles

1/2 C popcorn kernels
1/4 C canola oil (or oil of choice for popping)
3/4 tsp ground cinnamon
1/2 tsp ground ginger
a pinch of fresh ground nutmeg (or 1/4 tsp ground nutmeg from a jar)
2 Tbsp melted butter
1 Tbsp maple syrup
Optional: 1/4 tsp salt (or to taste) if you're into the sweet and salty combination.

Mix up the seasonings in a small bowl - feel free to adjust the amounts and spices to suit your taste.  I would think some premade pumpkin pie spice would be good instead, if that's what you have on hand.

Pop corn using your preferred method.  I'm sure you could use plain microwave popcorn instead of kernels in oil on the stovetop, you just might have to adjust the amount of butter/syrup and spices because microwave popcorn tends to make less.

While the popcorn is popping, melt the butter, then whisk in the syrup.  Dump the popped corn out into a very large bowl, then slowly drizzle the syrup/butter mix overtop, stirring to evenly coat the popcorn.  Sprinkle on about half of the spice mix and stir very well to combine.  Taste a few pieces and if you don't nearly faint with bliss, adjust the seasonings until you do. 

Monday, November 15, 2010

Menu Plan 11/16 - 11/29

Hey, sorry about the lack of menu plan posted this morning - I had a super busy day today and simply didn't have time to do it earlier.  Here it is, for those of you interested.  As always, let me know if you want a recipe and I'll do my best to post one.

11/16
B - Oatmeal, milk
L - Bean and cheese burritos
D - Grilled cheese sandwiches and tomato soup

11/17
B - Cereal, milk
L - Roasted potatoes, broccoli
D - Egg salad sandwiches, chips

11/18
B - Lazy Granola
L - Soup and crackers
D - Pizza pockets, baby carrots, applesauce

11/19
B - Cereal
L - Sandwiches
D - Tacos, tortilla chips

11/20
B - Skillet Breakfast
L - French bread (homemade - this stuff really is good enough to be the whole meal)
D - PW's Mushroom and Swiss Sliders with Spicy Fry Sauce, oven fries
Dessert - Banana cake with buttercream frosting, ice cream

11/21
B - Pancakes
L - Mac and cheese, broccoli
D - Hot dogs, baked beans, fries

11/22
B - Omelets
L - Sandwiches
D - Pan-fried chicken, mashers, corn

11/23
B - Peanut butter baked oatmeal
L - Soup and crackers
D - Cheeseburger calzone, baby carrots

11/24
B - Cereal
L - Quesadillas
D - Broccoli cheese soup, biscuits

11/25
B - Cereal
L - Thanksgiving @ Gram's
D - It seems unlikely that we'll need a dinner, but I'm going to have some chicken salad ready in the fridge, just in case we need a little something when we get back.

11/26
B - Eggs to order
L - Sandwiches
D - Personal pizzas

11/27
B - Peanut butter baked oatmeal
L - Broccoli with cheese sauce
D - Chili Cook's Burgers, oven fries
Dessert - Salsa Cake (courtesy of The Boy)

11/28
B - Pancakes
L - Nachos
D - Ham and mixed bean soup, rolls

11/29
B - Cereal
L - Soup and crackers
D - Spaghetti, garlic toast

Friday, November 12, 2010

Christmas Eve

Today I thought I'd share our Christmas Eve tradition - you know, in case you were wondering.  LOL 

On Christmas Eve morning we'll have homemade donut holes.  I'll make the dough and cut them, Bryant will fry them (seriously - I have no business being anywhere near 400 degree oil) and I'll roll them in powdered sugar or cinnamon sugar after they've cooled a bit.  We'll eat them while we chat, watch a movie or play a game. 

Lunch will be something light and easy; this year it's pierogies (Pibb's suggestion). 

On Christmas Eve we have a special dinner, one that we've developed into a tradition we take very seriously. Everything else is negotiable - even Christmas dinner, but never, ever, Christmas Eve dinner. When I asked the kids what they were looking forward to during the winter, the (very loud and often repeated) response was, "Christmas Eve dinner!"

Bryant will bring our rickety old card table into the living room and set it up near the wood stove.  Then we'll all help set up a buffet that would cripple most tables...

We'll bring out purchased fruit and veggie trays, letting the kids peel off the protective plastics and open the tubs of dip.  Bryant will sit at the dining room table, slicing a Log-o-Beef (what a weird name!) into thin disks, then cutting them into quarters.  We'll put the beef pieces with some Old Wisconsin snack sticks (kind of like a Slim Jim, but worlds better) and a selection of crackers and cheeses.  Next we'll bring out the Chex Mix (original, but not homemade) and several kinds of pop.  Disposable plates, silverware, cups and napkins will take up space on the wood stove, the food on the card table and the pop on the hearth.  Somewhere in the mix, there will be a cheesecake sampler - you know, in case we're still hungry after dinner...

After a moment of reflection and thanksgiving, we'll load up our plates and snuggle in on the couches to enjoy our dinner and movie.  The movie is just as important to me as the food, as far as tradition goes.  Every single year we watch the same movie - Mickey's Once Upon A Christmas. 

If you know me, you know that while I enjoy a lot of Disney movies, I'm not a huge Mickey and Minnie fan.  I don't have anything against them, I just don't love them.  But this movie...oh, this movie kills me.  It's a collection of three stories - one with Goofy and Max, one with Donald and his nephews and, my favorite, the one with Mickey and Minnie.  It's called, "The Gift of the Magi" and if you're familiar with that story, I'm sure you can see where this is going. 

Mickey wants to give Minnie a chain for her beautiful watch.  Minnie wants to give Mickey a case for his prized harmonica.  After struggling and scrimping, saving and trying, they both end up selling their most special possession to buy the perfect give for the other. 

I don't want to give away too much, but my favorite part is at the end.  Minnie and Mickey have each opened their gift and Minnie is sad that Mickey gave up his harmonica for her. Bryant will hold me just a little tighter and kiss my hair just as Mickey puts his hand on Minnie's, looks her in the eye and says, "You're all the music I'll ever need."

I'm getting misty-eyed just typing this.

When the movie is over and we've all eaten our fill, we clean up, tuck the little guys into bed and generally move on with whatever needs to be done. 

But I'll carry that moment in my heart all year long.

Wednesday, November 10, 2010

Scooter's Chinchilla Post

One of Scooter's school subjects is spelling and on Wednesday she has to write each of the week's spelling words in a sentence.  These are the sentences she wrote this morning (the spelling word is underlined).

1. Not again!

2. Please, you've got to believe me!

3. The angry chinchilla is loose!

4. I'm grateful you saved me from the angry chinchilla.

5. That chinchilla is poetry in motion.

6. That is enough!

7. The science of chinchilla study can be weird.

8. I truly meant to clean out the cage of the angry chinchilla.

9. How about you imitate the angry chinchilla...

10.  Do you know the vocabulary of the angry chinchilla?


That's my girl!

Chicken Potpie

Today's recipe is originally from Best Simple Recipes magazine, but came to me from a friend.  We were discussing meals to prepare ahead of time and keep in the freezer and she said she'd just read an article (with recipes) about that very topic.  The next day she brought me a photocopied page from the magazine and it's been in my recipe box since. 

In all honesty, however, I've never frozen this pie.  The recipe is designed to feed one small-ish family, twice.  For our large family, two pies are necessary for a meal, although we always have leftovers.  I'm including the freezing directions for anyone that wants to try it, and I do intend to buy a couple of foil pie plates so I can freeze a couple of pies for those days when I don't have the time/patience/fortitude to face cooking a big dinner, but we need something substantial. 

Chicken Potpie
Each pie serves 6 according to the recipe, although I always cut them into 8 slices, as I would with fruit pie.

4 C cooked, cubed chicken
4 C frozen Southern-style hash browns, thawed (the small cubes, not the shredded kind)
16 oz frozen mixed veggies, thawed and drained
1 10 3/4 oz can cream of chicken soup, undiluted
1 10 3/4 oz can cream of onion soup, undiluted
1 C milk
1 C (8 oz) sour cream
2 T all-purpose flour
1/2 tsp salt
1/2 tsp fresh ground pepper
1/4 tsp garlic powder
1 package, 15 oz, refrigerated pie crust (2 crusts in a box)

In a large bowl, combine the first 11 ingredients.  Divide between two 9 in deep dish pie plates.  Roll out pastry to fit the top of each pie, cover ingredients in pie plate.  Cut vents in the crust, then trim, seal and flute edges as desired.

Cover and freeze one pie for up to 3 months.  Cover and bake the other pie at 400 degrees for 35 - 40 minutes or until golden brown.

To use frozen pie: Cover edges loosely with foil; place on a baking sheet.  Bake at 425 degrees for 30 minutes.  Reduce heat to 350; remove foil and bake 50 - 55 minutes longer or until golden brown.

Personal notes: 
* I never, ever, thaw the veggies.  I always intend to, but I never get around to starting dinner until it's too late and they don't have a chance to thaw.  This has never been a problem for me.
*I've made this with a bottom crust, too and it's quite good.  It's really a personal preference, just remember to buy or make twice as much crust if you're going to want bottom crusts, too.
*Always put a cookie sheet on the next shelf down in the oven - this drips like crazy and no one likes the smell of food burning to the bottom of the oven.
*Because this is made to be frozen, I think it would be a perfect food to take to a neighbor or friend, someone sick, mourning the loss of a loved one, experiencing the mind-numbing, though thoroughly wonderful, exhaustion of a new baby or just someone who could use a night off cooking.  Make the pie(s), copy the recipe, being sure to include freezing and baking instructions and deliver.  The recipient can bake them right away or freeze them for another night.  Easy peasy.

Tuesday, November 9, 2010

Slacker

The Boy has a t-shirt that says, "Genius by birth, slacker by choice."

Never has that been more true than this morning.

He wanted bagels and I suggested that I could teach him how to make them.  He considered that for a moment, then said, "I don't know, my day is pretty full.  I've got some sitting around planned, I've got music to listen to, monsters to draw, and I need to make sure I have time to lay on my bed and read..."  Then he walked away.

Teenagers!

Sunday, November 7, 2010

On the Go

This post is really just a test of a Blogger app for my new phone.
Published with Blogger-droid v1.6.5

Friday, November 5, 2010

Just like you

Last night, as Bryant and I were leaving Walmart, we happened upon a rather precariously balanced piece of plastic being held up by the baskets of two carts.  On top of the plastic were a few odds and ends and a scanner.  I pointed at it, laughing and said, "That seems awkward and likely to cause trouble." 

My darling husband responded with, "Huh.  Just like you."


This morning, The Boy was playing Mario Kart and trying out a new bike.  As he awkwardly made the turns and repeatedly crashed into things (very unlike his usual Mario Kart style), Bryant commented that the bike looked like it had "slow acceleration, but fast top speed and was pretty hard to handle."  Then he looked at me and said, "Huh.  Just like you."


Yeah. 
It's a good thing he's cute...

Natural Beauty

Thursday, November 4, 2010

Sight Words

In his 1948 book, "Problems in Reading", Edward William Dolch published a list of 220 frequently used 'service words' and a separate list of 95 common nouns. These lists are estimated to contain 50-75% of the words in children's books.

These are often referred to as Dolch words and are broken up into levels.  The levels are pre-primer, primer, 1st, 2nd and 3rd level.  Obviously easier words, such as A and I are in the earlier levels and words such as yellow and because are in the upper levels.

Midge has struggled with reading and so we've been practicing sight words.  Today I thought I'd share our sight word activity schedule. We do this every weekday, every week.

Sunday:
*I choose the next 10 words and write them on the chalkboard in the dining room so they're ready for Monday morning.

Monday:
*Review words from previous weeks (yes, all the words from previous weeks).
*Introduce 10 new words and he writes them on 3 X 5 cards (one word per card) using his best handwriting.
*Roll a 10 sided die to assign each word a number, writing the number on the appropriate card, then putting the cards in the correct order.
*Use stamps to "write" each word in his Word Book (a steno pad).

Tuesday:
*Read this week's words together.
*Copy each word two times on the back of the card, using whatever medium he wants (crayons, markers, colored pencils, paint, stamps, etc....)
*Roll a 10 sided die and say the corresponding word - continue until all words have been said.  We usually do this as a game - he writes 1-10 twice on a paper, labeling his column and mine, then we see who can roll all 10 numbers first. 

Wednesday:
*Review this week's words together.
*In the Word Book, write a short sentence for each word, then he illustrates if he wants to.  Typically The Boy writes the sentences on a piece of scrap paper, then Midge copies them.

Thursday:
*Review this week's words together.
*Using pasta we've dyed in rainbow colors (that was seriously fun!), "write" each word.  I put a towel on the table, so the pasta doesn't roll away.
*If he's struggling with any words, we practice those a few extra times and I'll randomly ask him to tell me what the words on the chalkboard are.

Friday:
*Review this week's words together.
*Randomly choose words and ask him to find the correct card.
*He alphabetizes the words for the week.
*He reads all 10 words to Bryant, The Boy or Scooter.

So that's what we're doing.  It seems to be working pretty well - I can see the difference in his confidence level when he reads and that's really what I'm going for.  I know that he CAN read, he simply thinks he can't, so anything that builds his confidence and helps him feel like he's doing well is good with me.

Wednesday, November 3, 2010

Pull Apart Rolls

A few years ago I embraced my inner bread baker and it's been a wonderful experience.  There's just something amazing about mixing a few basic ingredients together, letting it rise and then baking some gorgeous, fragrant, fresh bread. 

One of the recipes I use time and again is pull apart rolls.  I serve these with everything from beef roast to pork ribs and a hundred other things.  They don't take terribly long and don't require a second rise.  Next time you feel like you want dinner rolls, give this recipe a try.

Pull Apart Dinner Rolls
Makes 12

2 1/2 tsp active dry yeast (or one packet, if you buy your yeast that way)
1 1/3 C milk
3 - 3 1/2 C flour - all purpose or whole wheat, or a combination
3 T extra virgin olive oil
1 T granulated sugar
1 tsp salt
1 T melted butter
Coarse salt for sprinkling

Heat milk to 105 - 120 degrees.  There's no need to get all fancy and crack out a thermometer.  Just stick your (clean) finger into the milk after it's been warming a few moments - it should feel like hot tap water.

Pour milk into mixing bowl; add sugar and yeast.  Allow this to sit for 5-10 minutes or until the yeast blooms.  Stir in 1 C flour, oil and salt, beat until smooth.  Stir in remaining flour, scraping dough from sides of the bowl, until soft dough forms. 

Those of you who have seen me bake will know that I am a very tactile baker - I use my hands for nearly every part of the process, including mixing.  I knead the dough entirely by hand, so I just mix it up then dump it out on the table or counter (floured) and knead in the rest of the flour that way.

Whatever your preferred method of mixing, when the flour is completely incorporated, place the dough in a large, well greased bowl, cover and let rise in a warm place until doubled, about 45 minutes to an hour.  We keep the house pretty cool, so I turn the oven on and let it heat to 200 degrees, then turn it off and set my bowl of dough on top of the stove to rise. 

After your dough has risen, heat the oven to 400 degrees.  Punch down dough in the center and fold it over a few times to mix it back up.  Grease a 12-cup muffin tin with nonstick cooking spray, set aside.  Pinch off 1 inch balls of dough and quickly roll into a rough sphere.  Place three balls in each muffin cup, brush with melted butter and sprinkle with coarse salt.  I have used kosher salt and Mediterranean sea salt (I loved both!).

I keep a small bowl of flour handy when I'm pinching off the dough balls.  If my fingers get sticky, I simply dip them in the flour and keep going, repeating as necessary.

Bake until crust is lightly golden, about 15 minutes.  Immediately remove from pan and eat.  Store any leftovers in an loosely covered bowl.

On a personal note, my children call these Bun Muffins.  They're baked in a muffin tin, hence the Muffin part of the name.  The bun part comes from the curves at the top of the rolls, especially when you've pulled a third of the roll off...  Yup, those are my kids.

Monday, November 1, 2010

Menu Plan 10/30-11/15

Good morning everyone!  Today I'm posting yet another menu plan, but before I do that, I have a question for you.  Are you reading these?  Do you care?  It just seems like a lot of typing for something that I have to wonder how many of you actually care about.  So let me know - keep going or find something else to write about on Monday mornings?

Okay, here we go...

10/30
B - Cereal
L - Sandwiches
D - Pile of bloody guts on toadstools with witch fingers AKA Sloppy Joes with fries

10/31
B - Chocolate chip pancakes (or regular, for those of us who don't enjoy the texture of chocolate chips in pancakes - I could write an entire post about how I feel on this subject)
L - Soup/sandwiches/leftovers
D - Shredded bbq brains, mashed maggots and ogre toenails AKA BBQ beef, mashed potatoes, corn

11/1
B - Cereal
L - Corn dog muffins, yogurt
D - English muffin breakfast sandwiches, patty style hashbrowns

11/2
B - Breakfast burritos
L - Sandwiches
D - Beef and black bean chili in bread bowls

11/3
B - Cereal
L - Pizza
D - Casserole Ole, corn muffins

11/4
B - Peanut butter baked oatmeal
L - Cheesy pasta with broccoli
D - Chicken with cider and bacon sauce, long grain and wild rice, steamed broccoli

11/5
B - Eggs to order, toast
L - Grilled cheese sandwiches
D - Pizza pockets, baby carrots, applesauce

11/6
B - Cereal
L - Soup and crackers
D - Ham and scalloped potatoes, steamed broccoli

11/7
B - Pancakes
L - Sandwiches
D - Beef stir-fry, rice, homemade fortune cookies

11/8
B - Banana streusel muffins
L - Sandwiches
D - Spaghetti with wild mushroom sauce, broccoli, garlic toast

11/9
B - Eggs, skilled smashed potatoes
L - Grilled cheese and tomato soup
D - Pigs in blankets, chips, baked beans

11/10
B - Peanut butter granola
L - Sandwiches
D - Chicken pot pie, glazed carrots, biscuits

11/11
B - Cereal
L - Egg salad in homemade pitas
D - White chili, slow rising peasant loaf

11/12
B - French toast
L - Quesadillas
D - BBQ meatballs, cheesy potato casserole

11/13
B - Cereal
L - Sandwiches
D - Baked potato soup, breadsticks

11/14
B - Pancakes
L - Roasted potatoes
D - Super burritos, tortilla chips

11/15
B - Omelets
L - Out, as it's shopping day

Saturday, October 30, 2010

Goblin Grub

Last year, while I was looking for Halloween-themed recipes, I stumbled onto this one.  Please believe me when I tell you it is like crack and if your health/weight loss routine is of any importance to you, you should really not make this.  Or, make it and take it to a gathering so lots of people can have a small amount.  But be prepared to share the recipe. 

It is not an exaggeration to say this is one of the most addictive snacks I've ever had or made.  Even when I know I should stop, when I know I've reached my limit and then some, I still want more.  It's sticky and crunchy and wicked good!

Goblin Grub
Original recipe posted here.

6 1/2 C rice Chex cereal
4 1/2 C Golden Grahams cereal
1 C sliced almonds (or chopped nut of your choice)
2 C coconut
3/4 C butter
1 C sugar
1 C corn syrup
1 tsp vanilla extract

In a very large bowl (and I mean VERY large), mix both cereals, almonds and coconut.  Set aside.

In a large saucepan, combine butter, sugar and corn syrup.  Bring to a boil, being sure butter is fully melted, then reduce heat to medium-low and cook 3 minutes.  Remove from heat and add vanilla.  It will bubble up a little when you add the vanilla, so be careful.

Pour sugar mixture over cereal mixture and stir well to completely coat the dry ingredients.  Spread the mix out onto wax paper to cool.

Dump it all back into a bowl or portion it out into individual serving bags or dishes.  This recipe makes a ton - somewhere in the vicinity of 11 cups of mix!

Sometime shortly after Halloween last year, I forgot about this recipe.  For the sake of my waistline, I hope the same thing happens again this year...

Wednesday, October 27, 2010

Broccoli Cheese Soup

Yesterday's loss of power, falling tree branches and heavy rains made the day a little more interesting than I typically like.  The kids were great sports about it and we spent the electricity-free time playing UNO and doing a science experiment involving how many drops of water will fit on a penny (any guesses?) and discussing cohesion and surface tension.

We did get our power back after a couple of hours and, by crazy random happenstance, had the perfect dinner already planned - broccoli cheese soup and baking powder biscuits!  This soup is perfect in so many ways.   It's relatively quick, very easy and can help use up those bunches of broccoli you bought, forgot about and recently unearthed from the bottom drawer of the fridge (not that you would ever do that) - the ones that aren't quite prime anymore, but aren't bad enough to just toss out.  This meal is wonderful for those days when the weather is crappy, you're cold and tired and just want to snuggle on the couch under a blanket.  Days like yesterday.

Broccoli Cheese Soup
Makes 8-10 good size servings and reheats well (for those of you not feeding a small army at every meal)

5-6 C broccoli florets - fresh or frozen
6 C chicken broth
1 1/2 C milk or half and half (I have used 2%, skim and a mix of skim and heavy cream - all have been delish, but the mix of milk and cream made a smoother texture, I thought)
1/2 C + 2 Tbsp all purpose flour
2 - 3 C grated cheddar
A few slices of bacon, cooked and crumbled
1/4 small onion, finely diced

Cook up the bacon to desired crispness.  Pour out all but a tiny bit of the grease.  Saute the onions in the leftover bacon grease while you work on the next step. Set the onions aside.

Steam broccoli (fresh or frozen), then chop however finely you like it.  If you want a super smooth soup, throw the broccoli in the blender and puree it.  I prefer to keep some of the texture, so I just rough chop it on my cutting board. Set aside.

Combine broth and milk in a large pan over medium high heat.  Slowly whisk in flour and cook, stirring occasionally, until desired thickness. I like to cook mine until it's about the thickness of unset pudding or melted ice cream.  Stir in broccoli and onions and reduce heat to low.

Cook about five minutes, then dump in the cheese.  Continue to cook until the cheese is completely melted and the soup is piping hot.  Season with salt and pepper as desired. 

Scoop out into bowls and top with sliced green onion and crumbled bacon.  Serve with biscuits or crusty bread of your choice.  Eat and nearly die of bliss.

Recipe originally found at Lynn's Kitchen Adventures website, but changed in a few ways to suit our family.

Tuesday, October 26, 2010

Black Pepper and Molasses Pulled Chicken

I originally found this recipe on MyRecipes.com, but since I've tweaked it pretty heavily, I'm not going to link the original recipe.  If anyone wants it, let me know and I'll add a link to the original.

8 Tbsp ketchup
2 Tbsp apple cider vinegar
3 Tbsp mustard (spicy, regular yellow, coarse ground, whatever floats your boat)
2 Tbsp molasses
2 tsp chili powder
1 tsp ground cumin
1 tsp fresh ground pepper (I just keep grinding more on until it looks right, so I'm not sure this measurement is accurate - I'm probably using close to double this amount)
1/2 tsp ground ginger
5 or 6 boneless, skinless chicken breasts, cut into 2 inch pieces

Combine all ingredients in a large pan and stir to combine.  Bring to a boil over medium-high heat, stirring occasionally.  Cook 20-25 minutes or until chicken is cooked through and sauce is beginning to thicken.  Reduce heat to medium-low and remove chicken to a plate.  Shred the chicken as much or as little as you like, then toss is back into the sauce.  When it's all shredded and heated through again, serve as desired. The sauce should be quite thick and there shouldn't be much of it left in the pan, it'll mostly be coating the chicken.

I usually serve this on kaiser rolls, ciabatta bread or other good, crusty bread, but it's also great spooned over mashed potatoes.  Because the sauce has a sort of smoky barbecue flavor, I like to serve this with cole slaw and chips, or if I'm feeling a little healthier, a veggie tray.

The leftovers, if you have any, are excellent the next day.  Just throw them back into a saucepan and heat.  If they're too dry, add a small amount of ketchup or BBQ sauce. 

This recipe is one that we come back to time and again - it's super simple, quick and delicious.  Since I buy my chicken breasts individually frozen, I just pull out as many as I need in the morning and let them thaw while I go about my day.  Perfect. 

Friday, October 22, 2010

Regarding Cookies

One side effect of my fall cleanup and recipe book making is that I've been going through my old recipe magazines/cookbooks/handwritten recipes and making note of ones I want to try.  This is my current winter baking list - this does not include things I don't use a recipe for or MW Candy (obviously this is non-negotiable, it must be made), nor does it include anything in my usual repertoire.

In no particular order...

  • Russian Tea Cakes
  • Peppermint Snowball Cookies
  • Espresso Thumbprint Cookies
  • Chocolate Hazelnut Corners
  • Poinsettia Blossoms
  • Heavenly Cappuccino Praline Bars
  • Snowman Cookies
  • Pecan Wafers
  • Malt Fudge Brownies
  • Shortbread Brownies
  • Macadamia Nut Cookies
  • Anzac Cookies
  • Peanut Butter and Toffee Blondies
  • MJ's Gingerbread Cookies
  • Spice Mingles
  • Toffee Coffee Brownies
  • Peanut Butter and Ginger Crackles
  • Glass Candy
  • Spicy Vanilla Pecans
  • Gingersnaps
  • Peppermint Taffy
  • Honey Butter Caramels with Sea Salt
  • Shortbread Lemon Bars
Obviously I won't be making all 23 of these in the next few months, but I'm going to try to make quite a few of them.  Do you guys have any preferences?  What would you like to see on the table at family gatherings?  Or, for those of you who get a treat box, anything you'd particularly like to try? 

Wednesday, October 20, 2010

Snack Crackers

My Mom used to make seasoned oyster crackers - they were delicious!  I remember making them once when Bryant and I first got together, but it wasn't the same.  They just weren't as good.  As the years passed, my tastes developed a little more and I've come to realize that I really needed to make my own crackers.  I found about a million recipes, so I sorted through a few and took what I liked.  Then I made my own version.  Scooter could have easily eaten a whole batch by herself - she LOVED them!

Snack Crackers
18 oz oyster crackers (Pookie used to call them moisture crackers)
1/3 C vegetable oil
1 1/2 Tbsp ranch dressing mix (the powder)
1 tsp lemon pepper (or fresh ground pepper, if that's more your style)
1 tsp dried dill weed
1/2 tsp garlic salt

In a small bowl, combine the dressing mix, lemon pepper, dill weed and garlic salt.  Mix well and set aside.

In a very large bowl, combine the crackers with the oil, stirring well to coat.  Sprinkle on the seasoning mix and stir very well to make sure the flavors get evenly distributed. 

I don't know for sure how long these'll last because my kids had them gone in a heartbeat, but I would think they'd be fine up to a week.  Just be sure to store them in an airtight container.

This is a great recipe on so many levels - it's easy enough that anyone able to measure ingredients and use a spoon can make it.  It's a great one to tweak with your own seasonings and measurements.  Or, be like Bryant and don't measure a thing - just toss in a little of this and a little of that and make it different every time.  It's up to you. 

It travels relatively well, so it's a great one to make and portion out to take on day trips.  We  like to go walking in the woods or spend the afternoon at the park, weather permitting, and we're often gone several hours at a time.  In lieu of buying extra snacks or finding a drive-thru, I try to pack granola bars, small bags of crackers or boxes of raisins; whatever we happen to have on hand.  I think this would be perfect for those days. 

These would also be a good substitute for popcorn if you know someone with braces or who just doesn't like popcorn (I really don't know how that's even possible).  The only issue I could see is that your fingers will get a little "seasoned" so if you're going to play on the Wii or any other game system while eating these, you'll need to wipe down the controllers when you're done.

So the next time you see oyster crackers on sale, grab a few bags and make these delicious snack crackers - you'll be happy you did.

Tuesday, October 19, 2010

Knitting and Kidlets

I asked for blog suggestions on Facebook this morning and thus far, I've gotten only one response.  "Knitting??? What's going on the with the kiddos?"  So here you go, Kelly...

Knitting:
The vast majority of my knitting in recent days has been gift knitting.  That's why there's no real update or information about it.  I will say this - the project I'm putting most of my effort into is made with yarn from recycled pop bottles and is crazy soft.  It's also deep charcoal grey, which I'm absolutely loving!  The pattern is simple enough that I can knit it without looking at my needles, but interesting enough to make a pretty finished fabric.  That's really all I can say - I'm not sure if the intended recipient is a reader or not.

I have one other gift knit in progress - it's green, a wool blend and has cables.  The recipient of that one is a reader, so that's all you're getting there, too. 

I did spend a few minutes last week learning how to make a ballband dishcloth.  For those of you who don't know what that is, here's a link to a photo.  I've always been afraid of working with two colors at once and have only done it in one project (but in that project I was making stripes, so I just carried the unused yarn up the side), this is different.  I've spend a lot of time on Ravelry and other sites looking at these cloths and waiting until I felt ready to try them.  But then I realized what I was doing - I have a tendency to put off anything I'm unsure of and I know myself well enough to know that if I didn't just jump it, it was never going to happen.  So I grabbed two contrasting yarns from my stash and set to work.  Remember a few sentences ago when I said I spent "a few minutes?"  Yeah, that's not an exaggeration.  It was super easy and I felt like a colossal fool for being so nervous about it. 

I did rip out the one I started, but not because it wasn't going well.  I ripped it because I'd just grabbed two yarns from my stash and they didn't work well together.  But I bought orange and black yarn this past weekend, so I'm hoping there's a Halloween colored ballband cloth in my near future. 

As far as the kidlets, there's not a lot of change going on.  The Boy has been itching to find someone to play D & D with, so we're looking into a game store nearby that hosts lots of groups for everything from Magic games to D & D and everything in between.  I'm hoping to get him involved either there or a youth center around the corner.  He has a hard time meeting people and socializing is not his forte, so I have been pushing him to pick something to get involved with.

Scooter has decided to learn Draconic (the language of the dragons) and has been studying a lot.  We found and printed a Draconic alphabet, as well as a list of over 100 common words for her to work with.  I'm sure that'll be a great asset to her when she's applying to colleges...

Pibb has been reading a series called, "The Last Apprentice" by Joseph Delaney.  The books are between 200 and 400 pages each and there are seven or eight, although he's not finished with the series, so I imagine there will be more.  He spends most of his time either playing with Legos and Bionicles or reading.  It's very gratifying to see him enjoy reading - it was extremely difficult to teach him to read.  He was convince he couldn't do it for a really long time. 

Midge is struggling with the same thing.  He knows the letters and he knows some words, but he's sure he isn't able to do it, so he barely tries.  We've just started a program of learning 10 new Dolch sight words each week.  Every day he has activities with the words (one day he gets to play with my alphabet stamps and "write" each word in his word journal, one day he gets to write the words with colored pasta, etc...)  The idea is that by the end of each week, he'll have learned 10 new words, learning all 220 Dolch words and 95 commonly used nouns by the end of the school year.  He's also had more interest in reading lately, asking for two or three chapter books each day and I think that's a good motivator for him.  He wants to know the stories, but I don't have time to spend 5 hours a day just reading to him, so he's having to try to read them on his own. 

Pookie is sweet, as always.  His main focus lately seems to be Legos and following his brothers around.  He's been paying attention when the bigger kids do school and has started recognizing letters and sounds without my formally teaching them to him.  He also knows all the numbers 0-9 and can write them on his own.  He loves to pretend to visit the ice cream store and is constantly bringing us pretend ice cream to eat.  Maybe I should take him to Cold Stone again....

And now I need to go make breakfast burritos (for lunch), but I'll be back tomorrow with a recipe!

Monday, October 18, 2010

Menu Plan 10/16 - 10/29

First off, let me apologize for the lack of posts around here lately.  There's no real reason for it, I guess I just got sidetracked.  We did get a lot done this past week or so and school has gone pretty smoothly lately, so maybe it's not such a bad thing.  I am, however, determined to pick up the pace a bit and hope to post at least every other day, if not daily. 

Today I'm posting our menu plan with links to a few of the recipes. Also, I'm listing a movie for each day.  Coming up to a holiday, such as Halloween, The Boy likes to list all the holiday appropriate movies we own and put them in a hat, draw one movie for each day and make a schedule for us.  That way we don't miss out on anything.  So here's my list of meals and movies for the rest of October.  Enjoy!

10/16
B - Basic muffins with streusel topping
L - Roasted potatoes
D - BBQ meatball subs, chips
M - Simpson's Treehouse of Horror, season 2

10/17
B - Pancakes
L  - Sandwiches
D - Cheeseburger calzone, chips
M - We actually skipped the movie, but it was supposed to be Halloweentown.

10/18
B - Eggs or cereal, milk
L - Spaghetti O's
D - Bowtie Lasagna, steamed broccoli, breadsticks (Since I'm linking the recipe directly, let me just point out my modifications... I'm using medium shells instead of farfalle this time (the store was out) and I use only half the sour cream called for - it's enough.  This recipe is very filling and a single batch is plenty for all of us and reheats well the next day for lunch.)
M - Frankenstein (1931, black and white)

10/19
B - Breakfast burritos
L - Sandwiches
D - Pigs in blankets, baked beans
M - Halloweentown 2

10/20
B - Eggs or cereal, milk
L - Cheesy pasta with broccoli
D - Mushroom and Swiss Sliders, oven fries
M - The Wolfman (1941, black and white)

10/21
B - Eggs to order, toast, milk
L - Sandwiches
D - Apricot glazed pork loin, green beans, potatoes au gratin
M - Say Cheese and Die/The Ghost Next Door (Goosebumps)

10/22
B - Peanut butter baked oatmeal
L - Corn dog muffins
D - French toast, sausage
M - The Nightmare Before Christmas

10/23
B - Granola
L - Eggs salad sandwiches
D - Bean and sausage mush, fries (recipe below)
M - Gremlins 2

10/24
B - Pancakes
L - Roasted potatoes
D - Meatloaf, mashed potatoes, corn
M - Corpse Bride

10/25
B - Eggs or cereal, milk
L - Grilled cheese sandwiches
D - Black pepper and molasses pulled chicken sandwiches, veggie tray
M - How I Got My Shrunken Head/Cry of the Cat (Goosebumps)

10/26
B - Pop up pancakes
L - Sandwiches, baby carrots
D - Broccoli cheese soup, biscuits
M - Simpson's Treehouse of Horror, seasons 3 & 4

10/27
B - Eggs or cereal, milk
L - Cheesy pasta with broccoli
D - Sweet and sour meatballs over rice, fortune cookies
M - The Haunted Mansion

10/28
B - Eggs or cereal, milk
L - Sandwiches
D - BBQ pulled pork, green beans, scalloped potatoes
M - Simpson's Treehouse of Horror, seasons 5 & 6

10/29
B - Basic muffins with streusel topping
L - Soup and crackers
D - Taco salad, quesadillas
M - Beetlejuice

There's been some curiosity as to exactly what bean and sausage mush is, so I'm posting the recipe.  This is one that Bryant made before we were together and, if I recall correctly, came from a book of game recipes.  We don't always have venison on hand, so we often make it with sausage instead.

For 8 servings:
2 packages of rope sausage or kielbasa
2 or 3 28 oz cans of baked beans, any flavor
Fries, potato wedges, slices, etc... Whatever shape of potato you like, cooked as desired (this isn't great with mashed potatoes, though, so use something with some texture to it)

Slice the sausage up fairly thin (1/2 inch slices) and fry it until it's caramelized and hot all the way through.  Dump in the beans and heat thoroughly.  Serve the bean and sausage mush over fries.  That's it.  Very simple, inexpensive and filling. 

As always, leave a comment if you want a particular recipe. 

Wednesday, October 13, 2010

Bagels

Years ago I was kicking around some recipe site (I don't even remember which one) and found a recipe for dinner rolls.   I was seriously nervous about working with yeast, but the rolls looked really good and fairly simple, so  I gathered my courage and gave it a shot.

In the years since then, I've made hundreds of rolls and countless loaves of bread.  And then there are the pita breads and bagels...  I even went so far as to stop buying bread products of any kind for a short while, I just made my own.  There is nothing, and I mean nothing on earth, like taking a bite out of  fresh, hot bread from your own oven. 

Today I'm sharing my go-to bagel recipe.  I have others, but this is the recipe I come back to time and again.  If you're like I was, a little nervous about working with yeast, this is a great place to start.  These are almost impossible to mess up and the end product is guaranteed to make you popular with whoever you choose to share them with.

Bagels
4 C bread flour (do not substitute all-purpose flour)
1 Tbsp granulated sugar
1 1/2 tsp salt
1 Tbsp vegetable or olive oil
2 tsp instant yeast
1 1/4 - 1 1/2 C warm water

Mix all the ingredients in a large bowl, using only the 1 1/4 C water to start.  Don't worry about soaking the yeast, instant yeast doesn't need it and you'd be hard pressed to find regular yeast in most grocery stores.  The dough should feel stiff, but add the extra water if the dough is crazy stiff or there's flour in the bottom of the bowl that you can't mix in.  Plop the dough out onto the counter and knead it for about 10 minutes or until it's uniform and smooth.  Cut the dough into 8 equal size pieces and let them rest for no less than 10 minutes, preferably 20 minutes.

Working one piece of dough at a time, roll it out onto the counter and make a snake just longer than both of your hands side by side (or long enough to wrap around one of your hands).  Overlap the ends and roll/squish them together to form a circular bagel-to-be.  Don't worry if they're not perfectly round, one bite and you won't care what shape they are!

Let the bagels rest again for about 20 minutes.  While they're napping, go ahead and get a large pot of water onto the stove.  Salt it and bring it to a good, rolling boil.  A rolling boil means that even when you're stirring the water, it's constantly moving and bubbling.  It's important that the water be fully boiling to get the maximum rise and deliciousness out of your bagels. 

After that 20 minutes, your bagels are starting to look a little puffy, so it's time to get the oven heated up and bagels into the water.  Preheat the oven to 425 degrees.  Working just one or two at a time, gently drop the bagels into the water.  They might sink at first, but fear not, they'll pop back up to the top in just a few seconds.  If they sink, your water probably wasn't hot enough.  Let them boil for one minute, flip them over and let them boil for another minute.  Pull them out and put them on a greased baking sheet while the next set of bagels boil.  You want them fairly dry when they go into the oven, so don't skip the drying time.  When the next set of bagels is done, take the ones you already did and put them on a greased baking sheet (the one you're actually going to cook them on).  Repeat this process until all of your bagels have been boiled. 

Put the tray of bagels into the oven and leave them be for 10 minutes.  Flip them over with a spatula or tongs (be gentle) and let them bake another 10 minutes. 

Now just let them cool for no less than 10 minutes, grab the cream cheese and prepare to feast on a delicious treat.

You can add whatever toppings you like (sesame seeds, poppy seeds, onion, etc...) - just have a dry plate handy with whatever you like spread out on it.  When the bagels come out of the water, lay them down in the plate, picking up some of the good stuff.  Start them in the oven topping side up, then flip and finish them topping side down.  When they come out of the oven, flip them back over.  If you want cinnamon sugar bagels, bake them plain, brush melted butter on top and then dip them into a plate of cinnamon sugar.  Allow to cool as above. 

This recipe makes 8 bagels and fills a standard size cookie sheet.  I often make a double batch, so when I flip the bagels, I also take the tray from the bottom rack and switch it with the tray on the top rack.  Or, you can do just one tray at a time, if you're more comfortable with it.